

Last Updated: March 2026
At a Glance: DIY Seedling Greenhouses
- Discover seven ways to shield young plants from frost and wind using upcycled household waste.
- Three of these builds, such as the egg carton (#1), mason jar (#5), and clear food container(#7), are hiding in your kitchen right now and take under a minute to set up.
- Master the skill of turning everyday household items into functional gardening tools to build family competence without the expense of a full-sized greenhouse.
RELATED: The Art of Seed Saving
Stop! Do you have these in your kitchen right now?
- Empty Egg Carton (If yes, jump to #1)
- Used 2-Liter Soda Bottle (If yes, jump to #2)
- CD Spindle Case (If yes, jump to #3)
- Mason Jar or plastic takeout container (If yes, jump to #4)
- Clear Plastic Wrap (If yes, jump to #5)
DIY Seedling Greenhouses: Start Growing Earlier and Smarter
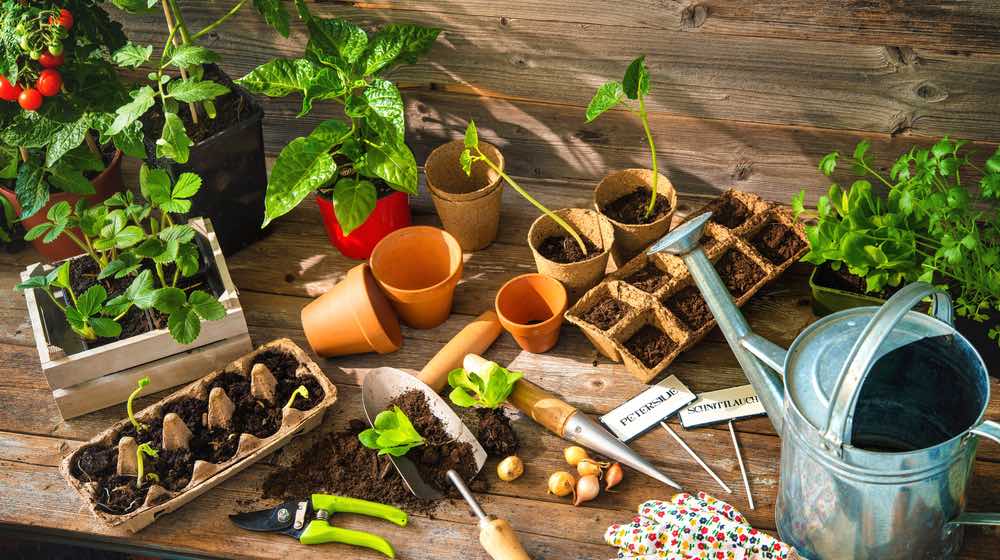
Starting seeds early can make a huge difference in garden success, but unpredictable weather often gets in the way. DIY seedling greenhouses offer an easy, affordable solution by protecting young plants from cold temperatures, wind, and pests during their most vulnerable stage.
Using common household materials like plastic bottles, storage bins, or recycled containers, these simple structures help create a warm, controlled environment for seedlings. Whether you’re gardening in a small backyard, raised bed, or patio, DIY seedling greenhouses make it possible to extend your growing season without investing in a full-sized greenhouse.
1. Egg Carton Greenhouse

This DIY egg carton seedling greenhouse will be one of your favorites when it comes to starting seeds in a small greenhouse. All you need is an egg carton as your germination tray.
Hint: It’s as simple as adding a clear plastic wrap or bag to your egg carton seedlings.
Fill carton cells with soil and seeds and mist with water. Stretch plastic wrap over the top and secure with a rubber band to create a high-humid dome.
READ MORE HERE: EGG CARTON SEEDLINGS
(As an Amazon Associate, we earn from qualifying purchases.)

- 4-TIER GREENHOUSE KIT - The 4 tiers of sturdy shelving in this small greenhouse are 27-inches-wide, have 14-inches of height...
- INDOOR OR OUTDOOR - The portable greenhouse is ideal for both indoor and outdoor use on your porch, patio, deck, or sunroom...
Last update on 2026-06-22 / Affiliate links / Images from Amazon Product Advertising API
2. Plastic Bottle Mini Greenhouse

A plastic bottle can be another great DIY greenhouse for your seedlings! It is a perfect way to save those plastic bottles instead of throwing them away.
You can recycle and upcycle the containers and turn them into these awesome seedling greenhouses. Most of all, you can help save the environment.
Slice the bottom off a 2-liter bottle. Position the top half over the seedling. Adjust the cap to regulate internal temperature and airflow.
3. CD Spindle Case Greenhouse
Do you still have those cases from your CD-burning days lying around the house? Did you know they make perfect greenhouses for your seedlings?
All you have to do is have an empty CD spindle case. Then you cut out the column at the center.
Cover up the hole at the base and drill a couple more on the top cover. Add your small pots and seeds.
That’s a simple seedling greenhouse idea you can do in no time at all.
Snip the center post from the spindle base. Insert small pots and sow seeds. Snap the clear lid on to lock in high humidity for delicate starts.
Turning old CD spindles into free humidity domes is a genius zero-dollar hack to start seeds, but your plants will outgrow them in a matter of weeks. You need to transfer them to a proper dedicated space to harden off, like this tiered setup:

- Nova 4 Tier Portable Greenhouse protects plants and seedlings from elements of weather and climate. Ideal for starting...
- 【Sturdy Construction】 The main shelves use high quality metal with powder coated, heavy-duty bearing net on each layer is...
Last update on 2026-06-22 / Affiliate links / Images from Amazon Product Advertising API
4. Clear Storage Greenhouse
Sometimes, temperatures can be erratic. You can have warm temperatures during the day and cold ones at night.
In these situations, grow your seedlings in small containers inside a clear plastic box.
You can take the totes out in the morning. This way, the plants can enjoy a day’s worth of sunlight and build up their tolerance to the cold.
Then at night, you can bring them inside.
Place multiple seedling trays inside a clear storage tote and secure the lid to trap heat overnight. Vent during the day to prevent plant scorch.
Using clear storage totes as mini-greenhouses saved my seedlings from erratic spring weather, but hauling them inside every night got tiring fast. I finally put the whole system on autopilot by hooking up a heat mat to a reliable digital temp controller so I never accidentally freeze or fry my plants. Here’s the exact one I use:

- 【Easy to use】 Supports °C/°F display.
- 【Dual relay】able to power refrigeration and heating equipment as conditions change.
Last update on 2026-06-22 / Affiliate links / Images from Amazon Product Advertising API
5. Mason Jar Greenhouse

A mason jar is a basic item for homesteading and canning. An old one, though, can make an awesome greenhouse for your seedlings.
You can make a simple but cute greenhouse with it. Simply make sure there is adequate airflow for the plant so it can thrive.
Invert a glass mason jar over an individual seedling and press the rim into the soil for stability. Utilize the heavy glass to buffer against sudden frost.
6. Plastic-Wrapped Greenhouse
This plastic-wrapped homemade mini greenhouse is another excellent addition to your list of ideas. It’s also easy to do and inexpensive.
This type of seedling greenhouse is an effective solution for difficult seeds. It’s also great for beginners since it needs only a couple of cheap gardening supplies.
Drape clear wrap over your seed-starting container and secure with a rubber band for a tight seal. Trap rising moisture to accelerate the germination of difficult seeds.
7. Clear Plastic Greenhouse

Who says you need a whole lot of equipment and tools to start your garden?
With this idea, all you need is a clear plastic food container with a lid. Then you can use tissue paper cores or cardboard rolls to complete the greenhouse for your seedlings.
Line a clear takeout container with cardboard rolls then fill with soil and seeds. Close the lid to create a portable, high-heat hothouse.
For more ideas on seedling greenhouses, check out this full tutorial video from OikoEco:
Of course, if you want the faster route to growing seedlings, you can buy a full-sized greenhouse. It’s already available on Amazon, and you can choose among the different sizes and even designs.
There’s something nice about upcycling old items, though. Besides, turning them into something useful, such as a seedling greenhouse, is a valuable skill.
Benefits of Seedling Greenhouses
The benefits of seedling greenhouses are numerous and can greatly aid in the successful growth of plants. Some of the key advantages include:
- Controlled Environment: Seedling greenhouses provide a controlled environment, allowing growers to regulate temperature, humidity, and light levels. This ensures optimal conditions for seed germination and early plant growth.
- Extended Growing Season: With seedling greenhouses, you can start your plants earlier in the year and extend the growing season well into the fall or even year-round. This enables you to grow crops that would not survive in harsh outdoor conditions.
- Protection from Weather and Pests: Greenhouses shield seedlings from extreme weather events, such as frost, hail, or heavy rains, which can damage or destroy young plants. They also serve as a physical barrier against pests and diseases, reducing the need for chemical interventions.
- Faster Growth: Seedling greenhouses provide an environment with optimized conditions for plant growth, leading to faster and healthier development. This can result in earlier and more abundant harvests.
- Water Efficiency: Greenhouses often incorporate efficient irrigation systems, reducing water usage and minimizing wastage compared to outdoor cultivation.
- Reduced Weeding: Since seedlings are started in a controlled environment, there is less competition from weeds, saving time and effort in manual weeding.
- Experimentation and Research: Greenhouses allow for experimentation with different plant varieties, growing techniques, and environmental conditions, making them valuable for agricultural research and development.
- Environmental Benefits: Growing seedlings in a controlled greenhouse environment can lead to reduced pesticide and fertilizer use, as well as lower overall resource consumption, contributing to a more sustainable agricultural practice.
- Portability and Flexibility: Some seedling greenhouses are portable and modular, offering flexibility in terms of location and setup. This versatility is beneficial for hobbyists and urban growers with limited space.
Small Greenhouses, Big Gardening Benefits
DIY seedling greenhouses prove that you don’t need expensive equipment to give plants a strong start. With a little creativity, you can protect seedlings, improve germination rates, and grow healthier plants, all while saving money.
These simple builds are ideal for beginners and experienced gardeners alike, offering flexibility, sustainability, and season-long benefits. Sometimes, the smartest gardening upgrades are also the simplest.
Ready to grow stronger seedlings this season?
Choose a DIY seedling greenhouse design that fits your space, gather a few basic materials, and start your garden earlier with confidence.
FAQs
1. Won’t the egg carton greenhouse (#1) get moldy or fall apart? Yes, if it stays too wet. Only use cardboard (not styrofoam) cartons and place them on a tray. Water from the bottom so the cardboard stays firm, and remove the plastic wrap the moment you see green sprouts to prevent mold.
2. How do I stop the center hole in the CD Spindle (#3) from leaking? Seal the base hole with a piece of waterproof duct tape or a dab of hot units. If you don’t seal it, water will drain out and ruin your furniture. Drill your vent holes on the clear top only.
3. Will the Mason Jar greenhouse “cook” my plant since it’s glass? Glass traps heat much faster than plastic. Never place a Mason Jar greenhouse in direct afternoon sun. Use it for bright, indirect light only, or the internal temperature will spike and kill the seedling in minutes.
4. How do I secure the cardboard rolls inside the Food Container (#7)? Pack the tissue paper cores tightly together so they support each other. If they are loose, they will tip over when you water them. Use the lid of the food container to lock them in place and create the humidity seal.
5. Which of these 7 methods is best for “leggy” seedlings? Use the Plastic Bottle (#2). Because you can cut it to any height, it provides the most vertical space for a seedling that is stretching for light. You can also bury a “leggy” stem deeper in the soil within the bottle to strengthen the plant.
QUICK POLL: Using plastic bottles and containers for growing. Practical upcycling or toxin roulette?
Vote above, then tell us what you think in the comments. Are the DIY upcyclers saving the planet, or just poisoning their own tomatoes? Drop your hot take below.