

Last Updated: February 2026
At a Glance: Tactical Flashlight Self-Defense
- Tactical flashlights work in weapon-free zones and count as less-than-lethal force, making them legal self-defense tools almost anywhere
- Reverse grip is best for striking as it gives you hammer-fist and backhand power for close-range targets like eyes, throat, and groin
- Practice drawing from your everyday carry position 10 times per hand daily to build muscle memory for high-stress situations
- Common mistakes: carrying in inaccessible locations (tight pockets, buried in purses), poor grip placement causing the light to slip during strikes, and relying on gear without regular training.
RELATED: BEST TACTICAL FLASHLIGHTS OF 2026 RANKED AND TESTED
After years of traveling stateside and abroad, the one tool that’s moved to the top of my list while in weapon-free zones, is my tactical flashlight.
TRAINING OBJECTIVES
- Phase 1: The Four-Phase Draw
- Phase 2: Choosing Your Fighting Position
- Phase 3: Securing a Rock-Solid Grip
- Phase 4: Target Zones for Survival
- Phase 5: Jump to Striking Drills
INTEL & GEAR
- Review: Jump to The Best Tactical Flashlights for Self-Defense 2026
- Reference: Jump to Comparison Table
- Download: FREE Tactical Flashlight Infographic
- Download: FREE Flash-and-Dash Printable Sheet
11 Reasons To Carry A Tactical Flashlight As Your Main Self-Defense Tool

1. Can use it for less than lethal deadly force (this will go far when appearing in front of a judge while in a foreign land).
2. It is built of sturdy, lasting material (usually aircraft grade aluminum, textured gripping area).
3. It gives me a better grip than my tactical pen (a flashlight is more robust than a pen, easier to grab & hold onto).
4. It is affordable, even on a tight budget (many options on the market especially if you are less worried about the illumination capability).
5. It has more substance to grasp when drawing it (it has a much wider form factor).
6. It is less scrutinized anywhere, won’t bring attention -even in Disneyland 😉 (a flashlight does not generally set off an alarm in people’s mind).
7. If you practice with a blade or pen, the movements are the same with the flashlight (a flashlight is primarily used with a reverse grip but can also work in a forward grip).
8. It is conveniently carried in your pocket just like a folder (no need to worry about security questioning or frisking -“it’s just a flashlight, officer”).
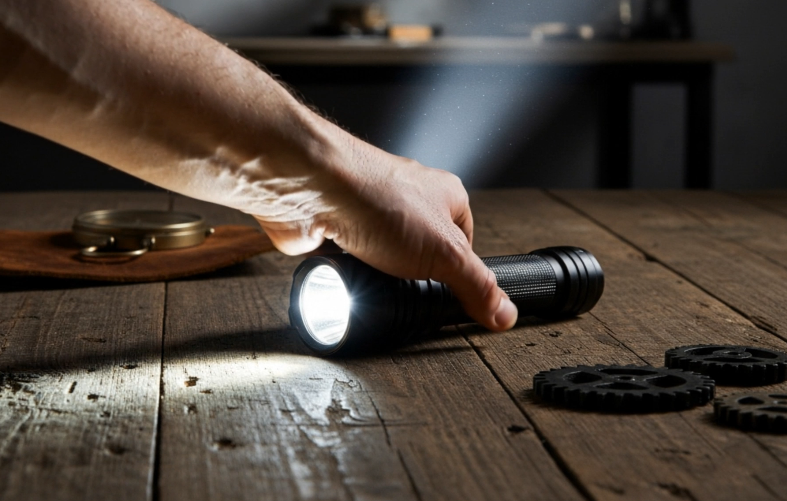
9. It has a practical use as an illumination device (extremely convenient to have an illumination device on you for countless reasons).
10. It has more surface area for self-defense striking (a pen has a very narrow point, and the flashlight has a wider area that allows you to fair better against your target).
11. Do not need to be a self-defense expert to use it (using natural movements while practicing will make you proficient faster than you think).
How to Use a Tactical Flashlight for Self-Defense
Forget the gadgets and the gear lists for a second; self-defense is about what you can actually do when someone is in your face and your adrenaline is redlining. This tutorial is about turning your tactical flashlight into a high-stakes survival tool through proper carry, a rock-solid grip, and strikes that count.
Step 1: Execute the Four-Phase Draw
Where you choose to carry your flashlight has everything to do with it being a viable option. If it’s buried under a heavy jacket or in a deep purse, you’ve already lost. To get the light into the fight properly, follow the Reach-Grip-Draw-Orient sequence:
- The Reach: Move your hand instinctively to your carry location. Don’t hunt for it; your hand should know exactly where it lives (like your front pants pocket).
- The Grip (In-Pocket): Secure the flashlight while it is still indexed in your pocket. As you see in the illustration, your thumb should already be finding the tail-cap while your fingers “choke” the body of the light.
- The Draw: Pull the light clear of the pocket in a single, upward motion. Practice this to ensure you don’t snag on tight denim or pocket liners.
- The Orient: Once clear, rotate the light into your fighting stance. This transition from pocket to “ready” happens in one fluid arc.
Step 2: Choose Your Fighting Position

In a combative situation, things go out of whack fast. You need to be proficient in these two positions so that no matter how the light comes out of your pocket, you’re ready.
Position #1: The Reverse Grip (Preferred)
This is my go-to choice. It offers the most control and power for blunt-force damage.
- The Technique: Deploy strikes using hammer-fist and backhand movements. The front of the light points down from the bottom of your fist.
- The Targets: Eyes, throat, nose, ears, teeth, groin, knees, and ankles.
- The Reality: This is NOT a Hollywood movie. We want one vital strike so we can get the hell away and survive.
Position #2: The Forward Grip (Secondary)
This is my choice for a blade, but it takes a backseat for a flashlight. Still, you must know it because 9 times out of 10, if you drop and grab your light, this is how it ends up.
- The Technique: Focus on stabbing and driving motions with the bezel (the “tip”). Use your body weight to drive the light forward.
- The Targets: High-sensitivity areas like the sternum, forehead, or ribs to create immediate distance.
- The Reality: There is no time to switch grips mid-fight. If it comes out forward-grip, you fight forward-grip.
Step 3: How to Secure a Rock-Solid Grip

The flashlight might have a great textured grip, but it’s useless if it flies out of your hand on the first hit. As a guy who sweats while standing still in a snowstorm, I’ve had to master the “how-to” of holding on:
- Center the Hand: Place your palm directly on the center of the barrel. If you “choke up” too close to either end, the vibration of the impact will pivot the light out of your hand.
- The C-Clamp Wrap: Wrap all four fingers tightly around the body, pressing your fingertips into the knurling (the textured part).
- The Thumb Anchor:
- In Reverse Grip: Place your thumb firmly over the tail-cap. This “caps” the light, preventing it from sliding upward through your hand when you strike.
- In Forward Grip: Brace your thumb against the side of the light to create a secondary point of tension.
- The Impact Squeeze: This is the secret. The millisecond before your light hits the target, squeeze with 100% of your hand strength. This locks the texture into your skin and ensures the tool stays in your hand.
Step 4: Targeting for Survival (Where to Strike)
In a self-defense application, you will be in very close range to your opponent. Because the tactical flashlight is a blunt-force tool, you need to focus on targets that cause immediate disruption to stop the threat so you can escape.
- Soft Tissue & Sensory Targets: If an attacker is grabbing you, use the bezel to strike the eyes, throat, or nose. These strikes cause involuntary physical reactions like watered eyes or gasping, giving you the window to run.
- Bony Protrusions (The “Hard” Targets): Use the weight of the light to hammer the teeth, ears, or forehead. A solid strike to the skull with a metal flashlight is incredibly disorienting and can end a confrontation instantly.
- Lower Body Disruption: If you’re facing someone larger, look low. Use a hammer-fist strike to the groin, knees, or ankles. A solid hit to the kneecap can instantly limit an attacker’s ability to chase you.
The Philosophy: We aren’t looking for a long-drawn-out fight. We are looking for one vital strike to a vulnerable area to end the confrontation.
Congratulations! You have successfully completed the tactical flashlight self-defense tutorial. Move to your next objective to keep the momentum going.
Practical Flashlight Striking Exercise

Find something that you can strike with your tactical flashlight.
If you have a heavy bag, great! If not, try to find something with similar attributes: A mattress, hang a foam pillow, stuff an old gym bag and hang it, etc. Use something that will not damage your flashlight. I would even put some electrical tape around the edges of the flashlight, as an added measure, to help protect it.
When you deploy these strikes, think about going at 70% of your maximum effort.
This will help the nervous system learn the information that you are feeding it and also keep you from damaging yourself and your gear. It is a good idea to get yourself checked out by your doctor and make sure that you are good to go for this type of physical activity.
Get in front of your striking target and draw your flashlight from your pocket or your other carrying position. Starting with a reverse-grip from the draw, naturally throw 10 backhand strikes at your target. Repeat 10 more times using your other hand.
Place your flashlight back into your preferred carrying position and draw into the forward-grip. Practice 10 strikes/stabs with your right hand. Place the flashlight back in your pocket and repeat the exercises using your other hand.
If you wear gloves, repeat the full exercise using gloves.
What are the best tactical flashlights for self-defense 2026?
Here are the top-tier disruptors of 2026 that balance raw blinding power with a build quality you can bet your life on.
Fenix PD36R ACE (Best Overall)

Features: 3,000 Lumens; 220-meter beam; 37-hour runtime.
Pros: Gold-standard build quality; exceptional runtime for emergency kits.
Cons: Dual-switch setup might be less intuitive for tail-switch purists.
Nitecore EDC27 UHi (The Commuter’s Choice)

Features: Ultra-slim flat body; 3,100 Lumens; OLED status display.
Pros: 44% thinner than standard lights; disappears in a pocket or laptop sleeve.
Cons: Internal battery is non-replaceable; flat shape is harder to grip with gloves.
Acebeam Defender P17 (The Home Defense Heavyweight)

Features: 4,900 Lumens; Dual tail switches; Stainless steel strike bezel.
Pros: Massive burst power; instant access to strobe; ceramic-bead glass breakers.
Cons: Runs extremely hot on Turbo; heavier than standard EDC lights.
SureFire E2D Defender Ultra (The Traveler’s Asset)

Features: Scalloped Strike Bezel®; Aerospace-grade aluminum; High-candela focus.
Pros: Legendary impact durability; specifically machined for defensive use.
Cons: Premium price; lower raw lumen output than 2026 competitors.
Olight Warrior Mini 3 (The Balanced EDC)

Features: 1,750 Lumens; 4.37-inch length; Nano-molding tail switch.
Pros: Compact powerhouse; proximity sensor prevents pocket overheating.
Cons: Magnetic charging requires proprietary cables.
I’ve spent way too much on ‘sun-cannons’ that were supposedly life-saving tools, only to have them flicker out the moment they hit the pavement. So I pitted the ‘Gucci’ duty-grade staples against the ultra-slim EDCs to see what’s actually worth the money.


Last update on 2026-07-23 / Affiliate links / Images from Amazon Product Advertising API
(As an Amazon Associate, we earn from qualifying purchases.)
Separate yourself from the masses and train often with your tactical flashlight. Let the “others” talk about their gear while you spend your time training with it. In the end, we all know who will be the one to survive…
Thanks for viewing, I hope that you found this information helpful.
Mastered the tutorial? Now take it to the range.
DOWNLOAD THE FREE TACTICAL FLASH AND DASH PROTOCOL PRINTABLE
FAQs: Tactical Flashlight Self-Defense
How do you use a tactical flashlight for self-defense?
Hold in reverse grip (front pointing down) and deploy hammer-fist or backhand strikes to vulnerable targets like eyes, throat, or groin. Practice drawing and striking at 70% power on a heavy bag to build muscle memory.
What is the best grip for a tactical flashlight in self-defense?
Reverse grip (front pointing down) provides more control and striking power than forward grip. Train with both grips since the flashlight may end up in your hand either way during a real confrontation.
What are the biggest mistakes with tactical flashlight self-defense?
Carrying in inaccessible locations (tight pockets, buried in purses), not practicing strikes on actual targets, and weak grip placement that causes the light to slip during impact. Regular training prevents all three.
Can you carry a tactical flashlight on planes and in weapon-free zones?
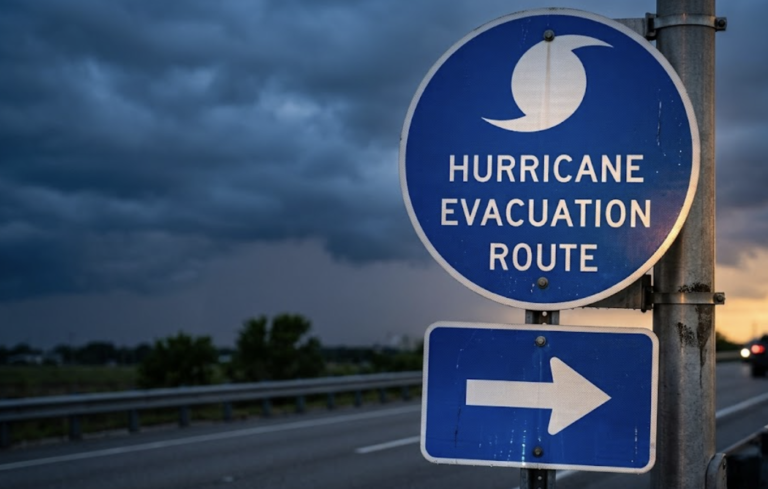
Yes, tactical flashlights are legal in most weapon-free zones including airports, theme parks, and government buildings. They’re considered less-than-lethal tools and don’t trigger security concerns like knives or tactical pens.
How often should you practice with a tactical flashlight for self-defense?
Practice drawing 10 times per hand daily whenever you pass your flashlight at home. Add striking practice on a heavy bag 2-3 times per week. This builds proficiency without requiring dedicated training sessions.
QUICK POLL
Is a tactical flashlight a legitimate defensive tool, or just a “security blanket” for people who are too scared to carry a real weapon?
If you voted ‘Security Blanket,’ tell us what real gear you carry instead. If you voted ‘Identification Only,’ explain how you avoid getting shot while trying to identify a threat.