Do It Yourself

3 Quick Tips To Identify Dry Firewood

Published

on

Feature | Quick Tips To Identify Dry Firewood

When you need a fire the most, conditions are often the worst for it.

But if you don’t have properly seasoned wood, building a good fire can be incredibly hard.

Using wet wood to get a fire going will leave you cold and frustrated…regardless of how much effort you put into it.

Even if you do get a fire going (which in a survival situation is better than nothing) your fire will be inefficient and will require much more maintenance to see it through the night.

The reason why it won’t burn is that the water contained in the wood is absorbing the heat, preventing the wood from absorbing enough heat to ignite.

As heat continues to be applied to the wood, the water turns to vapor, absorbing a huge quantity of heat in the process. It isn’t until this process is finished that the hydrocarbon gasses start leaving the wood so that they can then catch fire.

Basically your best bet is to make sure that you have the driest tinder, kindling, and fuel possible.

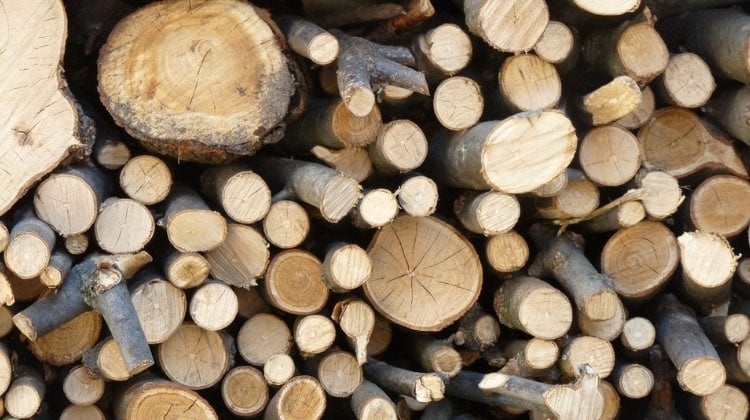
It’s one thing if you have a cord of wood neatly stacked out in your woodshed, but how do you find dry wood in the wild?

Blow are three quick tips you can use in a pinch.

The Snap Method

  • The Premise: Dry kindling is devoid of a high water content and will snap easily instead of bending.
  • How to Do It: Take your smaller bits of kindling no thicker than your thumb and grasp them at both ends. Pull the ends toward the middle. The kindling should snap in the middle.
  • What to Look For: Twigs, sticks and other kindling that snaps cleanly and easily and is an indicator of dry kindling.

The Percussion Method

  • The Premise: As wood dries out, it’s acoustical properties change.
  • How to Do It: Grab two sample pieces of wood at one end and let them dangle, one from each hand. Swing the bottom ends together and listen to the sound at impact.
  • What to Look For: Dry wood will “ring” or “bank” when they hit each other. Wet wood, however, will issue a dull thud on impact.

Cracking the Code

  • The Premise: As fuel wood pieces dry, the wood fiber shrinks, which causes visible radius cracks to open up on the ends of the wood.
  • How to Do It: Examine the ends of a sample piece, looking for cracks that radiate from the core to the bark.
  • What to Look For: Big, deep radius cracks are a good indicator of well-seasoned wood.

Note: This is the least reliable indicator, as the cracks won’t close back up if the seasoned wood is subsequently allowed to  re-absorb rainwater.

The first step to starting any good fire is finding your firewood… these tips will help you pick the right wood to start your fire, but do you know the best place to look for it (hint: it’s not that pile of brush on the ground)?

Check out this video from my buddy Craig Caudill that gives you a new perspective on where to look for firewood:


I hope you never have to use these methods, but if you’re ever put in a situation where you need them, you’ll be glad to know them.

Have  your own method to tell if your firewood is seasoned?

Share it with us in the comments below.

Continue Reading
20 Comments

20 Comments

  1. Tim

    January 20, 2014 at 6:51 PM

    Here’s a little trick if you’re in the woods and get caught in a rain storm or it is a particularly wet season and dry wood is hard to find, first of all look for dead limbs, branches, twigs, needles, that are still hanging from the tree as these just like clothes dry out faster hanging up in the breeze. Build your teepee fire just as always with at least a foot of room in diameter around the inside base and also verticaly inside the pile. Next, take your day pack out from under your poncho, cause I know you were smart enough to take one with you and your day pack is still dry cause I know before you started to cross questionable terrain you took it off and slung it across one shoulder or carried it in one hand so you could throw it to dry ground when you got into trouble, now fast running water that could make you lose the pack if you fell in is different. Cinch it up so it protects your back and cannot become seperated from you. Ok back to starting the fire, get into your pack and fetch the water tight Ziplock freezer bag you were thoughtful enough to stash in there with at least four(4)pull and strike Road flares. Ignite the flare and put it in the middle of your teepee, burning side up. It will burn long enough to dry out the sticks and twigs. You can use this flare while it is drying your wood to warm your hands, if you can’t get this method to work although it should you are going to need dry and warm hands to continue, if you are wet and cold your life will depend on it. I often joke that I never go into the mountains without 37 ways to start a fire. Also you would never go into the woods without the essentials of TP, it wouldn’t be very nice to have to use wet TP so I also keep it in a water proof baggie, besides it also makes good tender if you need to use it. I always keep dryer lint, fire starter cubes, a bic lighter, waterproof matches, a magnesium striker, and a length of cord,(for tying limbs together for a shelter). A lot of people say that this is too much stuff to carry, but if you are wet and cold, a fire is the only thing between life and death. A lot of people have died up on the mountain because they couldn’t get a fire started and tried to walk out and find help and got lost until it got dark on them.

  2. Michael

    January 20, 2014 at 7:58 PM

    I have been canoeing in the rain in March, where it rained all day. You have to build a fire to make it through the night and to get hot food. The driest leaves and wood is available under the deepest brush piles, you have to dig into them but you can locate dry wood, etc to start and maintain that fire. The bigger the pile the harder it is for rain water to soak through. Watch out for snakes in the summer though.

  3. james

    January 24, 2014 at 5:21 PM

    First I string up a heavy duty 10 by 20 tarp to work under to build the fire. You have to put it high up, so the smoke can go up and around. Then you have to split the wood to get to the dry kindling inside.This has enabled me to enjoy a nice fire in pouring down cold rain. Also look under rocks for dry pine needles and other tinder. Break dead branches off the tree instead of collecting on the ground. The tarp gets a little sooty, but you can wipe it off.

  4. Tom

    January 25, 2014 at 12:45 PM

    Good to know.

  5. Ervin Taylor

    January 25, 2014 at 1:21 PM

    Unless the tree limbs have been exposed to extreme water absorption,the wood is wet ONLY on the outside layers. Use a knife or saw and cut the wet wood away. The center portion shuold be dry and seasoned.

  6. carl

    January 26, 2014 at 6:10 AM

    Before going into the woods you should always bring a few must needed items. I read story’s of hikers who die because they froze or something to that nature. “PACK A BAG BEFORE GOING INTO THE WOODS” (1) a good working handgun (2) 3-4 fire starting items lighter, matches, flair sticks 3-4 at least , flint sticks.
    And put them in a waterproof bag. Then after you do so then do it again so you you have two waterproof bags with and extra set of tools to build a fire you can basically fit them in a eyeglass case. Then you should also carry a flint stick in your pocket along with a lighter. You shouldn’t be stuck like chuck if you know your going into the woods. Just to play it safe pack a back pack with a few basic items. A 10 X 20 tarp, a good Leatherman tool, fire starting tools. Rope, go to a surplus store and buy a few emergency blankets the one that look like foil and they fold into a box a little bit bigger then a box of baking soda, also while at surplus store pick up a portable water filter with bottle and a winds up flashlight, and to be even smarter take a small zip lock bags and fill it with some good “DRY” WOOD CHIPS or something like that, then fishing line hooks and a handheld scanner and gps thingy. I’ve seen in stores bracelets that were able to unwrap and give you 100 ft of paracord it wouldn’t hurt to buy 10 or so of them. After you get all those items laid out on your table grab your back pack and )must I say buy a nice backpack that may also have a few survival tools on them,) but anyway pack your bag neatly and then grab 1-2 pairs of socks and a a first aid kit and a Pancho incase it rains then after packing walk to you car and open your trunk and toss it in and forget about it. Then go back into your house and pack another bag just to have a spare. Do be one of those dip shits that die in the woods because you couldn’t build a fire. It’s never impossible to get a fire going and it’s also not a waste of time to you tube a video on how to rub sticks together to start a fire. Yes it’s hard to do but nevertheless it can be done. Now if this doesn’t help you then i guess it’s better to go die and rid this world of one less asshole. Thanks

    • Dan Robinson

      January 27, 2014 at 1:46 AM

      The real sport comes when you survive with the fewest manufactured, or have used them up.

  7. Dan Robinson

    January 27, 2014 at 1:35 AM

    I’m pretty familiar with firewood, wet or dry, but there’s something else others might find useful. If you sink your ax into a block of wood and it doesn’t split, as somewhat in the picture, what them? If the wood is heavier than the (single-bitted} ax, lift them together, turn them over and hit the ax on the chopping block, using the greater momentum of the wood to split it.

  8. Pingback: Three Quick Tips To Identify Dry Firewood

  9. Paul

    June 3, 2014 at 3:38 AM

    I don’t know if you folks have ever heard of ‘lighter knot’ (just google it) but if you ask some country folk they will know exactly what your talking about. What it is, is a pine or ceder tree that has been blown over by the wind, usually, and gets buried under leaves, dirt or sand for many years. What happens is the sap in the tree will migrate to the center of the tree and the outer portions will rot off leaving just the sappy portion. This is lighter knot, it is pretty hard but it burns hot like crazy with just a match and it doen’t take much to get even wet wood burnig. You can find it in the woods if you look for dead tree limbs sticking up out of the ground or sometimes rain water has washed away some of the dirt exposing a portion of the trunk of the tree. Use an axe, hatchet or knife to cut off some pieces and use it to start your fire. If you can find someone that has some and they’ll give you some, make you a small SHTF ziploc bag filled with small (1/4″x1/4″x 4″) strips of it to carry along in your bug out bag. One strip will start a nice and easy fire, just make sure you use the tee-pee method. Trust me I have started fires with this stuff in the rainest and windest conditions that I never want to try and start a ‘regular’ fire in.

  10. JD

    November 8, 2014 at 9:17 PM

    Even burning your initial wet(ish) wood will create enough heat to dry out your wood for future fire. Build your heat deflector to bounce the energy toward you and place the wood just between you and the fire!

  11. SmokeHillFarm

    February 1, 2015 at 3:35 AM

    You should have several methods (and a number of “fire helpers” in your pack, but one of the cheapest and most reliable is a Bic disposable lighter. Having two is even better. They are about a buck apiece, can sit in your bag for years without deteriorating, and will give you THOUSANDS of lights (based upon my experience as an ex-smoker).

    Do NOT get the cheap Asian clones — many of those fail after a half dozen uses, and they’re a bad deal even if they’re free. I know Bic is a great brand, and possibly another name brand like Ronson may be OK — I have never personally tried them since I always buy the Bics. They are in every vehicle I own, in every bag I may carry, and I always have a few dozen at the house.

    Also, when they eventually run out of fuel, the Bic has such an oversized flint that you can still get sparks long after the fuel is gone. Sometimes sparks are all you need, so don’t throw away that “dead” lighter. I’ve taken them apart and found over a quarter inch of flint left after the fuel is gone.

  12. Pingback: 31 Survival Skills for the True Outdoorsman | Survival Life

  13. Pingback: How to Start A Fire Without Matches | Survival Life Videos

  14. Pingback: DIY Firestarter: How to Start a Fire With a Battery

  15. Pingback: How to Start a Fire Without Matches | Savvy About Survival

  16. Pingback: The Benefits of Using A Wood Burning Stove On Your Homestead

  17. Pingback: Survival Skills: 31 Essentials for the True Outdoorsman | Survival Life

  18. Pingback: 31 Survival Skills For The True Outdoorsman - Survive!

  19. Pingback: Coppicing Trees for Firewood | Coppicing Trees for Survival – Sprent Brass

Leave a Reply

Your email address will not be published. Required fields are marked *

Trending