
Last Update: July 2026
At a Glance: How to Install Solar Panels
- Do the Math: Calculate your daily energy consumption to ensure your solar setup meets your baseline survival or off-grid needs.
- Gather the Gear: A successful setup requires both electrical components (batteries, inverters) and structural hardware (mounts, sealant).
- Mount with Confidence: Learn the fundamentals of positioning for maximum sun exposure and the step-by-step process of how to install solar panels securely to your roof.
RELATED: DIY Solar Power (Part 1)
In the first installment, I talked about how solar power works and the types of solar panels available.
In this article, I’ll share with you how to calculate the amount of solar energy you’ll need to support your home or boat, exactly what materials you need to get the job done, and the step-by-step basics of physically mounting your panels. For the third and final post, we will dive into the electrical side: wiring it all together and connecting your battery bank.
How Much Power Do Solar Cells Make?
Generally, we measure solar panels by wattage, and that is how we buy them. You can buy solar panels for boats or off-grid cabins as small as 10 watts to as large as 200 watts or even higher. But it is much easier to understand when we convert watts to amperage.
We arrive at these values by multiplying the panel’s wattage by the number of hours the panel spends in full sun (usually defined as about 6 to 8 hours per day, depending on your location).
- For a 195-watt solar panel, the output would be: 195 watts x 8 hrs = 1,560 watts/day.
- Taking it a step further to find your amps: 1,560 watts ÷ 12 volts = 130 amps per day.
Keep in mind that solar panels produce DC power, which means you will need a deep cycle battery bank to hold the charge. Batteries are rated by the amp hours (AH) they hold.
The Energy Audit
My guiding principle on how many panels to buy is simple: Buy as many panels as your budget and mounting location will allow. You cannot have too many! However, you should complete a basic energy audit to make sure you are buying enough for your baseline needs.
For example, if you have 3 interior lights that draw 2 amps each, and you leave them on for 4 hours per day, your consumption would be: 3 lights x 2 amps x 4 hours = 24 AH/Day. You can generally find the amp load for appliances on a label inside the door or on the back of the device.
What Materials and Tools Do You Need?
Obviously, one or more solar panels are necessary to make the system work. But beyond the panels, a basic DIY installation requires two categories of gear: Electrical and Structural.
The Core Electrical Components:
- A large bank of deep cycle batteries (the bigger the bank, the better).
- An inverter (choose between pure sine or modified—we’ll discuss this in Part 3).
- A solar charge controller.
- Proper AWG wiring, MC4 connectors, and fuses.
The Installation Materials & Tools:
- Mounting Hardware: Z-brackets (for flat surfaces like boats/RVs) or aluminum mounting rails (for home roofs).
- Hardware: Stainless steel lag bolts and washers.
- Roof Sealant: High-quality silicone or Dicor sealant to prevent roof leaks.
- Tools: A power drill/driver, stud finder, measuring tape, socket wrenches, wire strippers, and a multimeter.
Positioning Your Solar Panels
Before you drill a single hole, you need to know where your panels are going. Location is everything.
- Face the Equator: If you are in the Northern Hemisphere, your panels should face true South. If you are in the Southern Hemisphere, point them North.
- The Right Angle: For optimal year-round performance, tilt your panels at an angle roughly equal to your geographical latitude.
- Watch for Shadows: A shadow falling on just 10% of a solar panel can drop its power output by 50% or more. Keep them away from chimneys, tall trees, and TV antennas.
The Step-by-Step Installation Process
Disclaimer: Always prioritize safety. If you are working on a roof, use a safety harness. Never work on a wet roof, and always have a partner.
Step 1: Mark Your Layout Using your measuring tape and a chalk line, mark exactly where your panels will go. If you are installing on a roof, use a stud finder to locate the underlying rafters. You want your bolts to anchor deeply into the wood structure, not just the thin roof decking.
Step 2: Install the Mounts (Brackets or Rails) If using rails, drill your pilot holes into the rafters. Crucial step: inject a generous amount of your roof sealant directly into the pilot holes before driving the bolts in. Place the mounting bracket over the hole, drive your lag bolt down tight, and then seal over the top of the bolt head. This guarantees a watertight seal.
Step 3: Secure the Panels With your rails or brackets firmly attached to the roof or deck, carefully lift your solar panel into place. Most modern panels have pre-drilled holes on their aluminum frames. Line these up with your mounting hardware and bolt them down securely using stainless steel hardware to prevent rust.
Step 4: Route the Cables Your panel will have two wires (a positive and a negative) with MC4 connectors on the ends. Tuck these wires securely underneath the panel frame using zip ties so they aren’t flapping in the wind or rubbing against the roof. You will route these wires toward the spot where they will enter your home or cabin to connect to your charge controller.
Figuring out the math and physically drilling into your roof or boat deck is often the most intimidating part of building an off-grid system. By completing a basic energy audit, gathering the right structural hardware, and following the steps on how to install solar panels securely, you have done the heavy lifting. You should now have your panels facing the sun and firmly bolted down.
When I was researching the best way to tackle DIY solar projects, the sheer number of individual components completely overwhelmed me. I quickly realized that picking up an all-in-one starter kit is the smartest way to bypass the frustration of mismatched cables and missing brackets. If you want to skip the headache and dive straight into the fun part of the installation, here are three top-rated solar kits you can easily grab here:

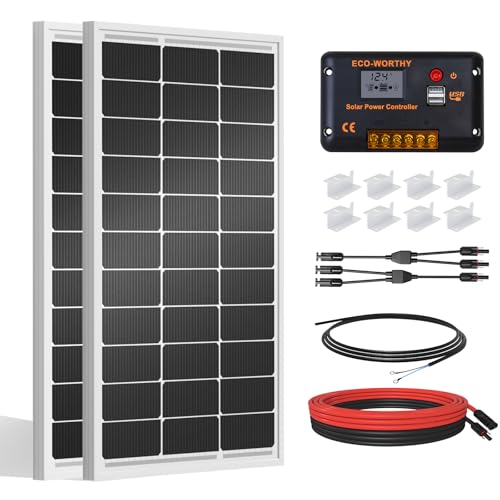
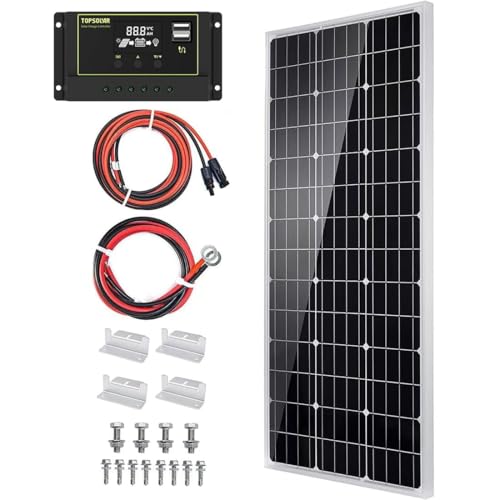
Last update on 2026-09-29 / Affiliate links / Images from Amazon Product Advertising API
Do you find this article helpful in your plans for installing DIY solar power? Share your thoughts with us in the comments section below!
Frequently Asked Questions (FAQs)
Do I need a permit to install solar panels? If you are installing an off-grid system on a boat, RV, or a remote shed, you generally do not need a permit. However, if you are mounting panels to a residential home especially if you plan to tie into the local utility grid later—most cities require structural and electrical permits. Always check your local building codes first.
Can I install solar panels completely by myself? Yes, but having a partner makes a massive difference. Solar panels are large, heavy, and catch the wind easily like a sail. Getting them onto a roof safely and holding them steady while bolting them down is a two-person job for safety reasons.
What happens if a small part of my panel is in the shade? Because of how solar cells are wired in series, shading even a small corner (like 10%) of a single panel can drastically reduce the power output of the entire panel, sometimes by 50% or more. Always position your panels far away from the shadows of trees, chimneys, and TV antennas.