Family
9 “Crazy Simple” Tips To Build Your Emergency Food Supply
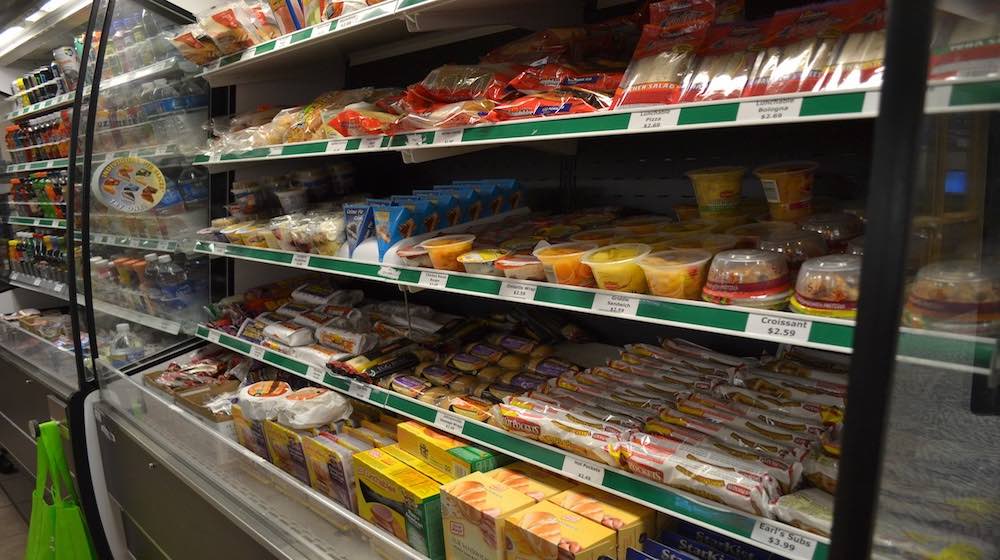
These days, it seems as though everyone has something to say about emergency food and emergency food storage.
You will find advice telling you not only what to buy, but how much to buy, where to buy it, how to store it and to a lesser degree, how to eat it.
For the food storage newbie, all of this information can be overwhelming.
And for the experienced food storage maven, every new piece of advice will have you wondering whether you have done it right or whether there is a better way.
To use one of my favorite laments, it can all be too much!
Today I am going to do us all a favor and offer 9 crazy simple strategies for building an emergency food supply.
Shall we get started?
Emergency Food Checklist
Click here to jump to the infographic.
1. Take Your Time and Go Slow:
If I can cite the number one reason people become overwhelmed when even thinking about putting aside an emergency food supply, it is the perceived sense of urgency that it all needs to be done right now. And this, for many, results in complacency and inaction. Don’t fall into this trap. Begin with a three day supply and gradually build that up to a week. After that, add to your emergency food supply week by week until pretty soon, you have three months of food stored away for you and your family.
Remember, it is perfectly okay to pick up only 4 or 5 extra cans of meats, fruits or vegetables during your weekly trip to the supermarket. Do what you can at a pace that you are comfortable with and ignore any message you get from others (including prepping forums and websites) to do it all at once.
2. Spend Your Money Wisely:
There is no reason to break the budget while building an emergency food supply. Before heading out to the supermarket, view the local ads and find specials that will allow you to purchase more for less. If you are so inclined, use coupons and if allowed, shop on “double coupon” days.
Warehouse clubs such as Costco have coupons too so don’t overlook those booklets that are sent out monthly. Often times the savings are huge. If you do not belong to a warehouse club, perhaps you can tag along with a friend or call ahead and see if they will give you a one-day shopping pass.
Don’t overlook shopping at one of the many Dollar Stores or even in the back aisles of the drugstore. Bargains abound as I recently learned when I picked up a half dozen cans of DAK ham for less than $3 each.
3. Scope Out and Optimize Your Storage Space:

Finding a place to store your emergency food supply can be a challenge, especially if you live in a small home or apartment. Get creative, starting with a walk around tour of your living spaces. Places often overlooked are under beds, way up high in closets where you can add another shelf, and under dressers, desks, and sofas.
My number one tip, though, is to go through your cupboards and closets and remove those items that are duplicates, that you rarely use, or that you do not use at all. For example, in your kitchen, how many different pots and pans do you need? My guess is that you use the same two or three over and over again. Stow the extras away in the basement or storage locker or give them away to charity. Trust me, they will not be missed. The same thing applies to seldom-used clothing, shoes and sports equipment.
If you are truly serious about finding the space for your emergency food supply, you will toss those miscellaneous items that are only used once every three years in order to free up space for some additional canned or dried food items.
4. Stick to the Basics:

Monitor what your family eats for a week and use that as a guideline for getting started. The advantage of doing this is that you will learn what your family likes so that you can shop accordingly. You would be surprised at how many people can’t remember what they ate yesterday let alone a week ago. Try to write everything down so that you don’t have to rely upon your memory.
Keep in mind that bulk foods such as beans, rice, oatmeal, and powdered milk are staples in the survival food pantry. Relatively speaking, they are all (with the exception, perhaps of the milk) inexpensive. These are the basics, yes. But if you are just getting started, why not begin with the food your family eats – but only in canned form?
Also, do not forget to store at least one gallon of water per person per day along with your emergency food supply.
5. Don’t Make it a Chore:
Storing food for an emergency can be challenging but it does not have to be a chore. Eliminate the panic of attempting to get it all done at once and the process can almost be fun and game-like. Searching out deals – either with coupons or at sales – can be an adventure in and of itself. Involve the kids by asking them for suggestions and helping them make selections that they will enjoy eating.
Continue the adventure by learning to cook with traditional storage items such as the bulk food items mentioned above (beans, rice, oatmeal, and powdered milk). Adding condiments of various types will result in delicious meals not only now, but after an emergency when good tasting food will be a comfort.
6. Pay Attention to Storage Conditions:
Notwithstanding finding the space for your emergency food supply, consider the storage conditions in your home. The enemies of food storage are temperature, moisture, oxygen, light, pests and time. Then there is the two-legged variety (such as teenagers!) who eat everything in sight, including your emergency food.
While not all household conditions are perfect, be aware of the six enemies of food storage and do your best to mitigate their effect on your precious food supply. This means you should avoid storing food in garages that are 90 degrees and summer and 30 degrees in winter. Empty your cupboards and closets of excess stuff and stow these items in the garage. This will make room for you to store your food inside your main living area where the ambient room temperature is stable.
7. Rotate Out and Replenish In:
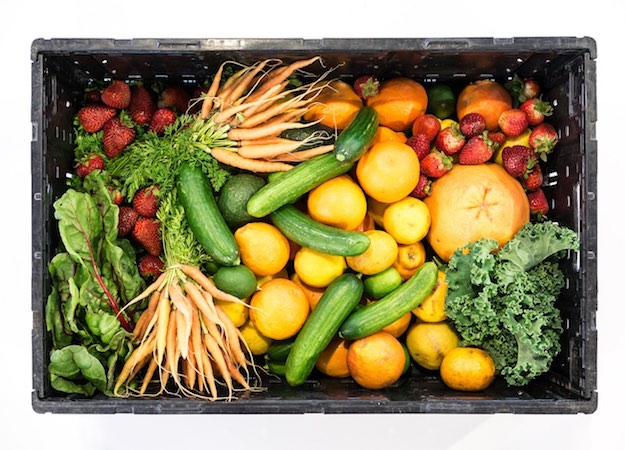
Nothing lasts forever, so periodically go through your emergency food supply and rotate out the oldest items. You can do this once a year or even every two years. Just remember to replenish what you remove.
The exception to this rule is if the food items have been packaged for long-term storage, either by the manufacturer or yourself. How to package for the long term is beyond the scope of this article but you will find plenty of tips in the following three articles here on Backdoor Survival:
Food Storage Part I – A Primer on Oxygen Absorbers
Food Storage Part II: Unraveling the Mystique of Mylar Bags
Food Storage Part III: Food Grade Buckets, Lids and Gamma Seals
8. Keep Track of Your Stuff:

Once you get going, it will be easy to lose track of what you already have. The best way to overcome the state of confusion you will experience six months down the road is to start keeping track of your stored items now – from the beginning. Use a spiral notebook, a computer spreadsheet, or a clipboard and a pad of paper. Update your inventory with the item and date of purchase as it goes into storage and of course, mark it off as it rotates out.
Another good idea is to use a sharpie or a colored label to mark the purchase date on each item. That is the crazy, simple way of using the FIFO method of food rotation (FIFO = First In, First Out).
9. Do Your Homework:

Resources abound. With a modest amount of computer knowledge, you can Google around the internet to find all sorts of emergency food and food storage advice. Be an informed consumer. Learn about the foods that store well and also about pre-packaged meals that only require a bit of hot water to create a good-tasting and satisfying food experience.
Learn about bulk foods and cooking methods that you can use when there is no power in your home. Many of the websites selling food will have blogs as well as links to helpful information. Why not use them to increase your overall knowledge and to become familiar with additional tactics and strategies for storing food for the long term in a hassle-free manner?
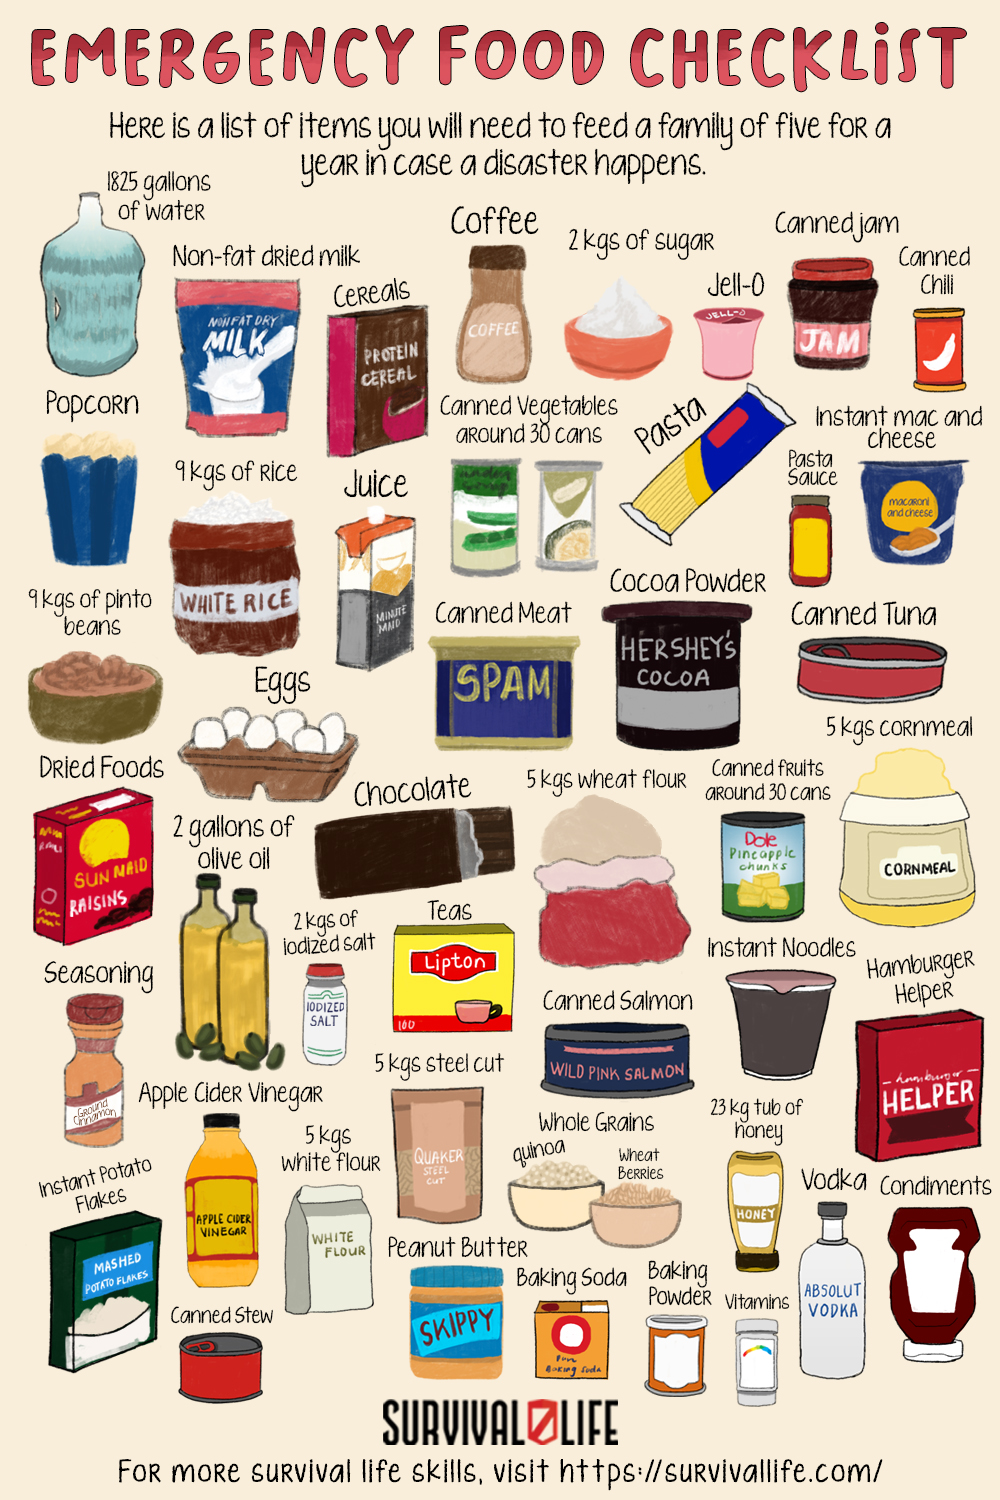
Here’s an infographic guide. Don’t forget to download, save, or share this handy infographic for reference:
The Final Word:
While it is true that an unexpected disaster could happen at any time, the reality is that we prepare for far more than a natural disaster. A sudden illness, unemployment, and even expensive car repairs may all contribute to the need to prepare and to have food and supplies at the ready.
Learning to overcome the feeling of being overwhelmed as you begin to store food for an emergency or for the long term does not have to be daunting. Start with these crazy simple tips and you will be well on your way to becoming an emergency food storage maven.
Secure your food supply for whatever the future has in store. Check out these for inspiration:
How To Build An Emergency Food Supply
Build a 6-Month Food Stockpile on a Tight Budget
Food Storage | Guidelines For Stocking Your Pantry
-

 Paracord Projects1 year ago
Paracord Projects | 36 Cool Paracord Ideas For Your Paracord Survival Projects
-

 Paracord Projects1 year ago
How To Make Paracord Survival Bracelets | DIY Survival Prepping
-

 Medical Care1 year ago
21 Home Remedies For Toothache Pain Relief
-

 Knife Laws1 year ago
Are Switchblades Legal? Knife Laws By State
-

 Do It Yourself1 year ago
Survival DIY: How To Melt Aluminum Cans For Casting





R Karpe
August 19, 2013 at 12:14 PM
Installing a 6″ wide shelf ABOVE the door inside the closet/s is often overlooked and valuable storage space is missed.
Marius
August 21, 2013 at 1:20 AM
Not really good, because all the heat stores above the top end of doors. And unless you have a fan in your closet, if in your home are 70 degrees, in your closet, above the door are maybe 90, 95, or even more. If you don’t believe me, do some homework with a thermometer – doesn’t have to be an expensive one…
Jacob
April 25, 2014 at 1:40 PM
Marius, you’re right about the higher areas being warmer, but it is my humble opinion that the more storage space, the better. You can use the extra storage space to store non-perishable items while using the lower space for foods/perishable items. It’s hard to go wrong with more options.
james
September 12, 2013 at 10:21 AM
We have a lofted cabin, storage type. The ceiling in it i changed to 2×6 for support strength. Sence i have weight baring walls now i can store lots of stuff in loft. Then i see a spot over looked. The space between loft and main floor ceiling. 5 1/2 inches of un used space. Temp stays good for food. So i put 5/8 plywood up and started putting canned goods in that erea. About a week in each space between joist. Its out of site. Not at all easy to find. I know my wife knows. But the guy who kicked in your door while you were out hunting wont have a clue.
Maxilyn
August 19, 2013 at 12:39 PM
Nearly painless way to build your stores is to buy two every time you replace an item. For example, if we ate a can of peaches last week, I’d buy two this week.
I keep an inventory on a card file–one card per item. Date, store, how many in, how many out, running balance, price plus notation of whether on sale or close-out. After a while I can look back and see that we ate two dozen cans of peaches over the past six months, we have 25 in store so I can stop buying extra. And this grocery has them on sale about every so many weeks so that’s the time to restock. It’s a bit of trouble, but it’s worth it.
rotciv
August 19, 2013 at 1:53 PM
File cabinets make excellent storage.Some are accurately stackable.
Keep a eye on acidic can goods.They can make a mess if they corrode through the can,
san
August 20, 2013 at 8:30 AM
I am newbie on this survival and liked the 9 crazy simple tips for storage. can you give me an example of the acidic can goods to avoid?
Marius
August 21, 2013 at 1:27 AM
Sauerkraut, tomato juice,anything pickled. Anything wich tastes sour, even a little, in time will corrode the metal container, or the metal cap from a glass jar.So be carefull.
Dick
August 19, 2013 at 3:43 PM
A Boy Scout handbook is a valuable tool for your bug out bag. Plenty of facts, tips, how to’s, ideas and more………..
patti
August 20, 2013 at 1:03 AM
Have been a low key prepper going on two years now. Read every article available. Thank you to the author. This is good advice. A limited income can be very challenging. But the buy an extra can every trip to the store is what has helped my food storage program flourish. Except meat. I just have trouble buying the canned meat. Yes a lot of tuna. A little chicken and turkey(hate white meat, does anyone do dark meat?)
And because we canned our own beef when I was a kid, Have not yet found beef that doesn’t smell like dog food when you open the can.
This may be something I just have to learn to ignore.
Deborah
August 22, 2013 at 4:38 PM
Try honeyvillegrains.com for dried meats.
Dan
August 20, 2013 at 3:43 PM
The hard part for me is a wife who thinks I’m crazy for stocking so much food. She uses it, which helps with rotation, but doesn’t tell me
that I need to replace it. I try to tell her that dish soap and toilet paper don’t have expiration dates…..;-)
She’s also against the high sodium content of most canned/boxed/Long term storage foods and the high sugar content of canned fruit, so she
doesn’t want to help by using those foods in rotation.
Marius
August 21, 2013 at 2:07 AM
That’s funny! It may be hard to do it, but why don’t you try to teach her a lesson? Take her on a camping trip (most women love it)and then let a little disaster, after a little disaster hapen, you know, like, when you’re deep in the wilderness come up with “Ups honey, I think I forgot to put in the trunk the bag with barbeque meat, so we’ll have to do it only on bean cans”. A little later: “Shit swethart, I got the barbeque pit, but I forgot the charcoal…” And when she starts crying she wants back home, come with:”Damned my love, I’m a complete idiot, I forgot to fill the tank! We we’ll never making back with this vehicle…” Well, you got the idea. Of corse, you have the 4 gallons of gasoline hiden beneath the backseat,while your tank is almost empty. Of corse the charcoal is near the gasoline, and the barbeque meat hiden near the spare wheel wrapped in carbon snow,not ice (because when ice melts makes a lot of water,when iced carbon dioxide melts,turns in gas,and has much much more refrigerating power) but she doesn’t have to know.You give her one miserable night outdoors, eating beans and bacon straight from the cans warmed at a campfire,and you can keep that treatment for another day. Of corse, at some point, you will have to pull out the delis, and, if you will still be alive 15 minutes after she realize what you did to her, believe me, she will take you seriously on you prep efforts!
Robby777
August 25, 2013 at 6:15 AM
Well, be sure you also have plenty of cash socked away – divorce lawyers are expensive !
Marius
August 26, 2013 at 2:01 AM
Well, if you made a mistake at the begginning…Taking a Gold digger for a loveling heart – yes! But if she married you because she really loved you ( and maybe still does )a little lesson about why important stuff is so imporant, and if you cannot get them at ANY PRICE, when you need them, may be very successfull…
If she loves you,she’ll get it! And never will question your prep thinking.
Who knows, she may even start a vegetable garden by herself, like the wife of my one of best friends did…
Practical Parsimony
September 8, 2013 at 1:45 AM
I would only learn I could not trust you in good conditions, so how could I trust you in a hard situation? I advise no one to try something like that. How could anyone learn anything about prepping? It makes no sense.
Leah
September 24, 2013 at 1:35 PM
An alternative to the “camping trip” that might end up disastrous would be a backpacking trip with only the supplies you can carry…my late husband took me 7 miles up into the Colorado wilderness years ago with 70 lb. pack for me and a 80 lb. pack for him for a week. He’d brought fishing line, so we had fresh brook trout nearly every meal along with the dried foods. Taught me a lot about survival, and how important that extra sodium in dried foods can be, not to mention how delightful it was to share the single can of peaches in syrup that last night!
lea
April 16, 2014 at 11:06 PM
Perhaps I will do this with my husband. He is the one who thinks I am nuts with the food storage, water when we have a well, blankets stacked up, ammo, etc. He would NEVER survive without meat – not even for a weekend camping trip!! He doesn’t like beans no matter how you cook them.
Shirley
August 20, 2013 at 5:10 PM
I keep telling my son to prepare for the unexpected, but, he wont listen to me. When I empty my Gallon Tea Jugs or Milk Jugs. I wash them out good and put water in them. they are good for washing your dishes or sponge bathe if you lost your water. i change them out every 6 months. I use pop bottles for my drinking water. I date them and change them out every six months with fresh water. I have them stored in my big walk in closet in my apartment. also have several canned items and a sterno stove and slowly getting extra sterno as I go along. I am worried about the shtf soon. I want to be prepared. I buy the sugar free koolaide packets for my water if I want flavor in it. thank you for your advice. I loved it!
Deborah
August 22, 2013 at 4:40 PM
Make sure that whatever flavoring you use for your water don’t contain carcinogenic chemicals, like asparatame. You want to be healthy & alive.
Keith
November 17, 2013 at 7:30 PM
I read somewhere that milk jugs can be dangerous for water supply. I would just recommend getting The $7 bpa water jugs from wally world, they are safer and not that expensive.
cindy
August 20, 2013 at 6:07 PM
Living in TX, in a small house w/ one car garage and no basement, storing anything is really a challenge! So I’m using my motivation to prep, to clear out closets, cabinets, and drawers to make room for our stash. Also: the garages down here can exceed 100 degrees much of the summer! I’ve managed to get some of our stuff indoors by storing lesser-used dishes and serving ware out there instead.
Karl Elze
August 22, 2013 at 6:54 PM
First off, you need to decide, if your goal is long term or short term and are you planning to bug in or bug out. Canning and can goods are great if you are bugging in and making your stand at home, but are too heavy to bug out. Freeze Dried or Dehydrated foods are best for bugging out. Also, don’t forget our 4 legged friends as well !!!
Debbie
August 23, 2013 at 4:00 PM
An instructor I had for a work related survival course recommends calling an emergency (known only to you & your spouse) and taking the entire family up the mountains for the weekend with only your 72 hr kit and live off whatever you have in there. Not only does this help rotate the food you store in there, but quickly makes it obvious what you may need to add.
He also suggested that you could throw the 72 hr kit in when you go on vacation and eat from the contents even if you are at Disneyland. Saves money eating at the park and again gets you to rotate the food with fresh supplies.
GD
August 23, 2013 at 9:16 PM
I need to store water for drinking but how long will stored water last in plastic gallons?
Maxilyn
August 23, 2013 at 11:17 PM
Use the plastic bottles juice and soda come in and add 4-5 drops of bleach per half gallon/2 liters. Should last 6 months to a year without problem. When you rotate it out, dump it in the washer when you do a cold load or in the garden or on a tree. Don’t just pour it down the drain. And don’t store plastic bottles directly on concrete; it causes a toxic reaction between the concrete and the plastic. Of course, if you don’t want to have to worry about rotating it, just can it in glass quart or half gallon jars. Boil in the canner at least 20 minutes.
Marius
August 26, 2013 at 2:27 AM
Lady, if I would be General Lee, I would want you my in my Staff as Health Administrator for the troops.
If I would fly in a mission to Mars, I would still want you as a crew member, but only after you were trained about Colloidal Silver Technology…
Which mainly was widespread in the Lincoln’s era, but 98% of US people today have no idea about.
sue reynolds
August 27, 2013 at 12:51 AM
Milk jugs break after a few weeks. Don’t trust them to store anything. The hard plastic juice jugs and soda bottles last much better. You don’t want a flood in your food storage area!
Bob L
September 6, 2013 at 10:24 AM
I store water in my greenhouse for 3 reasons. First to water plants, second to store heat in the winter, and last as an emergency water supply. Some of those gallon jugs have been in use since 2010. I can remember 2 that have sprung leaks. I treat them rough, like stored on unfinished lumber shelves, and throwing them in a pile until I have 20 30 to refill. The temp last week in the greenhouse was > 120. My thermometers only go to 120, so it might have been 130-140 with shade cloths and an exhaust fan.
Happy Preppers
September 8, 2013 at 9:19 AM
Great tips! Here are the 37 foods to hoard (totally free information) and NOT a costly eBook: http://www.happypreppers.com/37-food-storage.html
Lady Ice
March 18, 2014 at 10:46 PM
A good source of food for a pantry are local, ethnic stores. I have picked up bags of beans, rice, dal, chickpeas, red, green and yellow lentis. I have also stocked up on spices such as cumin, cardamom, dill, thyme, turmeric powder and cardamom. I can buy a big bag of supplies for as little as $10.00 Not bad for foods that are good and nutritious with long shelf life. I repackage into mylar bags with a bay leaf and oxygen absorber.
Pingback: Bio Prepper | 9 “Crazy Simple” Tips To Build Your Emergency Food Supply
LadyNonaLuna
October 2, 2014 at 4:56 PM
Love all of these tips… would only change one thing! Do your homework should be number 1…LOL! 🙂
Pingback: 9 “Crazy Simple” Tips To Build Your Emergency Food Supply | US Crisis Preppers
cliffarif
January 30, 2017 at 2:50 PM
Sage Advice, I couldn’t say it any better or any simpler. Key point to remember, you and your family are in it together so you must act as a team even if one doesn’t seem to understand the consequences or
repercussions of not being prepared.
People that lived through the Great Depression understood what it means to go hungry, no job, no hope. When things got better they still learned to save for the rainy day. They saved their money as well as stored food, a lesson their children forgot to teach their children out of the abundance they had achieved. Now is time to remember the lesson of the past so that we today can have the abundance that our parents once shared with us. We need to learn to use what we have in abundance sparingly and save for our own rainy day. Remember, for every feast there is a famine.
disqus_qiB0euZy39
February 2, 2017 at 5:57 AM
One gallon per person per day is a whole lot of water to store for an
emergency, depending on your group size and storage space. For those
who get their water from a well, or have a well nearby that could be
accessed in an emergency, there is a backup tool called the Emergency Well Tube
which can be used to secure water and possibly reduce the amount of space used
to store water. That space can be used for other supplies.
Pingback: The 6 "Unbreakable Laws Of Survival" You Need To Know
Pingback: Food Preservation | How To Freeze Dry Your Food In Your Home
Pingback: DIY Home Security for Preppers | Badass SHTF Home Defense
Pingback: Appetite Fatigue: It Hits More than Just Your Waistline | Survival Life
Pingback: Unbreakable Survival Laws | Survival Life
Pingback: How To Survive Epidemics | Survival Life Tips | What You Need To Know
Pingback: Proven DIY Home Security Tips to Protect Your Family - Survival Patch
Pingback: Proven DIY Home Security Tips to Protect Your Family
Pingback: Proven DIY Home Security Tips to Protect Your Family - Survive!
Pingback: The 6 “Unbreakable Laws Of Survival” You Need To Know - Survive!
Pingback: How to Make Hardtack | Survival Life
Pingback: How To Make Hardtack: The Survival Food That Never Goes Bad - Survival Patch
Pingback: How To Make Hardtack: The Survival Food That Never Goes Bad – Ultimate Assets
Pingback: Proven DIY Home Security Tips To Protect Your Family | Primitive technology
Pingback: Proven DIY Home Security Tips To Protect Your Family – Ultimate Survival Alerts
Pingback: Emergency Food Storage In Small Spaces – Ultimate Survival Alerts
Swtnspyc
September 13, 2022 at 8:47 PM
I’m not a soda drinker, but I do use the gallon jugs from my distilled water (CPAP user) jugs to store water successfully. I do as a few drops of bleach and just heat the lid a tad before screwing it back on to ensure a good seal. So far, no leaks.. rotating them every year.
I also dehydrate food (fruit, veges, jerky) like crazy, make my own spices and dried herbs (cheaper than store bought!), and can jams, pie fillings, sauces, stews, etc. when produce is on sale.
Hubby is likely going to have to build me more shelving soon.
Pingback: Prime 10 Greatest Prepper Meals Provides: Safe Your Survival – outdoorequipmentguide.com