

Take self-sufficiency to the extreme by starting a winter vegetable garden. Here’s your survivalist guide to winter gardening!
In this article:
- The Perks of Winter Gardening
- Cool Season Vegetables or Winter Crops List
- Choosing Your Container
- Homemade Containers
- Newspaper Seed Starter Pots
- Soil Block Starter Pots
How to Start a Winter Vegetable Garden
The Perks of Winter Gardening

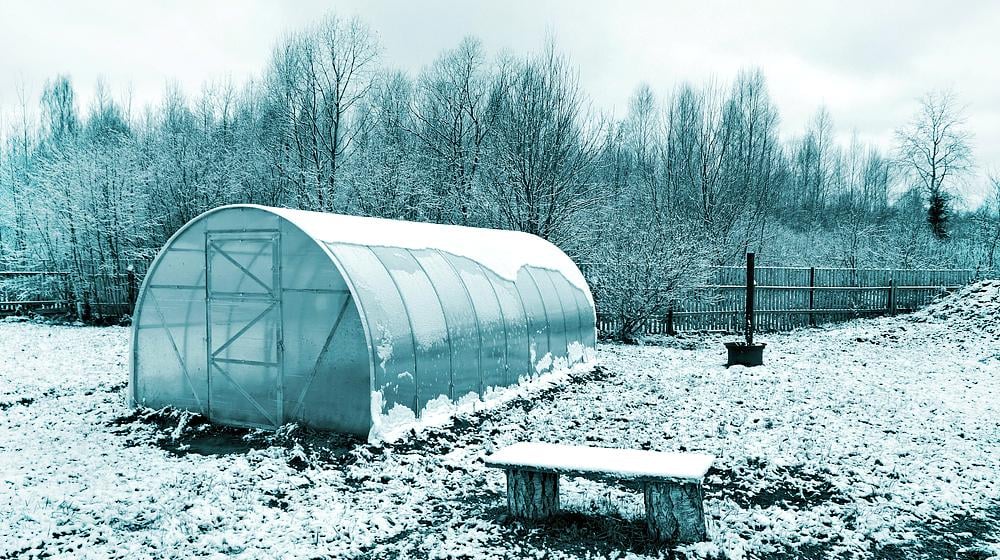
Winter looms in most parts of the country and snow lies thick on the ground, but that doesn’t mean it’s too early to start a winter vegetable garden. It’s neither too late even to still do some harvesting from your late fall crops.
Starting your seeds indoors will give you earlier vegetables and even flowers. The process of germination may seem complex, but just relax and take it step-by-step. In no time, you’ll be the proud parent of some brand new seedlings.
Choose the correct work area — a surface at a comfortable height and close to a water supply with plenty of room to spread out. Assemble your equipment:
- Seed-starting containers
- Starting medium or soil mix
- Watering can
- Labels
- Marking Pen
- Cool season crop seeds
Cool Season Vegetables or Winter Crops List

Of course, winter gardening is feasible, but there are rules to be successful. Here are a few of these winter gardening tips. When it comes to the variety of vegetables though, you need to go for the cold-hardy ones. Here’s a list of winter vegetables you can grow this season:
- Brussels Sprouts
- Swiss Chard
- Lettuce
- Winter Kale
- Collard Greens
- Lettuce
- Cabbages
- Beet
- Kohlrabi
- Broccoli
RELATED: 5 Gardening Tips And Tricks You Can Use Right Now!
Choosing Your Container
You can start seeds in just about any kind of container to start a winter vegetable garden. Make sure you follow two simple guidelines when choosing a container.
- Hold 1 to 2 inches of starting medium or soil mix
- Has good drainage so it won’t become waterlogged and drown your plants
You can start seedlings in open flats, in individual sections of a market pack, or in pots. Individual containers are preferable because the more you disturb growing roots, the more likely you are to do serious damage to the plant.
Biodegradable containers like paper pots, soil blocks, and peat pots can be planted directly to the soil. This way, you don’t risk disturbing the roots. Other needs to be slipped off containers with the root ball.
If you are planning to remove the pots before they go in your garden, be sure to use rectangular or square containers. They make better use of space and provide much more root area than a round pot would.
Take note that individual containers dry out much faster than open flats. Excellent seed-starting systems are available from garden centers and mail-order suppliers but you can also build your own.
Homemade Containers
Below are two make-at-home seed-starting containers that are quick and simple. Before you toss out that old newspaper, you should think about using it to make “single serve” seed starter pots.
Newspaper Seed Starter Pots
- To make newspaper seed starter pots, begin by cutting bands of newspaper about twice as wide as the desired height of a pot (about 4 inches wide for a 2-inch-high pot). Wrap a band around the lower half of a jar a few times, and secure it with masking tape.
- Then from the bottom of the pot by creasing and folding the paper in around the bottom of the jar. You can also put a piece of tape across the pot bottom to hold it more securely in place. Slip the newspaper pot off the jar.
- Set your pots in high-sided trays with their sides touching. As you fill them with the potting mix, they will support one another. If you are not a very crafty person, you can also purchase pre-made molds!
- Make sure you only use the black and white print papers, none of the glossy advertisements that come with newspapers. You can also turn the pots into compost by shredding the paper and removing the plants!
Soil Block Starter Pots
Soil blocks encourage well-branched roots and produce good seedlings. I recommend you buy pre-made Soil Block Molds to make soil blocks because making them by hand is a messy, labor-intensive process.
- Begin by mixing a wheelbarrow-load of potting soil.
- Add in plenty of peat moss and water to make a thick, wet, gummy paste with the texture of peanut butter.
- Jam the soil-block mold into the block mix, push block maker down, turn back and forth, and lift.
- Set the filled block maker into a tray squeeze and release.
- Then arrange the blocks in flats and plant directly into them. Make sure that the soil blocks don’t dry out. Due to their high peat content, once they dry it is very hard to for them to absorb water again.
- Water from the bottom or mist gently until roots grow. Once the roots have grown and filled the blocks, they become solid and easy to handle.
Using these two simple methods can give you a great jump start to grow a healthy winter vegetable garden. Did you know you don’t have to have a ton of space to grow all the produce you can possibly want? In fact, you only need a few square feet, and it doesn’t even have to be outside!
Check out this video from AmishSurvivalSecrets for tips on how to grow a winter vegetable garden:
Gardening is one of the most important survival skills, but growing a winter vegetable garden is the ultimate test. It’s not going to be easy, but who says surviving an SHTF is? Come what may, it will be easier for you than those who don’t give a heck today.
Have you tried making your own winter vegetable garden? Tell us how it’s going in your comments section below!
Up Next: Winter Survival | What To Do When The Heat Goes Out
For awesome survival gear, you can’t make at home, check out the Survival Life Store!
Follow us on Facebook, Instagram, Twitter, Tumblr, and Pinterest!Editor’s Note: This post was originally published on February 11, 2013, and has been updated for quality and relevancy.