Do It Yourself
4 Spring Prepper Projects You Can Learn Now

Excited to start making spring prepper projects? With spring weather finally resurfacing in many regions of the country, you should be! It could mainly be for fun but the long-term goal is to learn prepper skills for survival if…SHTF.
Spring Prepper Projects: Warming Up For Prep Projects
Learning new skills and cross-training other members of your family (or a mutual assistance group) should be an integral aspect of your overall prepping plan. Every single prepper I know looks at their retreat or homestead as a work in progress. (You should too.) There is always a new concept to test, repairs to make, a project to try, or something to build just like this ultimate DIY list of survival hacks, projects, and recipes.
Here’s a round-up of the top four spring prepper projects and skills to add to your survival weekend practice sessions!
1. Dakota Fire Hole
A Dakota fire hole is a simple fire-building method that emits low light and creates very little smoke, so you don't need to worry about unwanted attention in a survival situation. The fire pushes hot air from the fire exit points through the top of the pit. This creates suction and draws more oxygen into the hole, increasing the heat. Because of this, you don’t need much firewood compared to a standard fire ring.
Watch the video below to learn how to build a Dakota fire hole:
2. Perimeter Security On The Cheap

For less than $100 you can build a durable, reliable, low-tech perimeter security device.
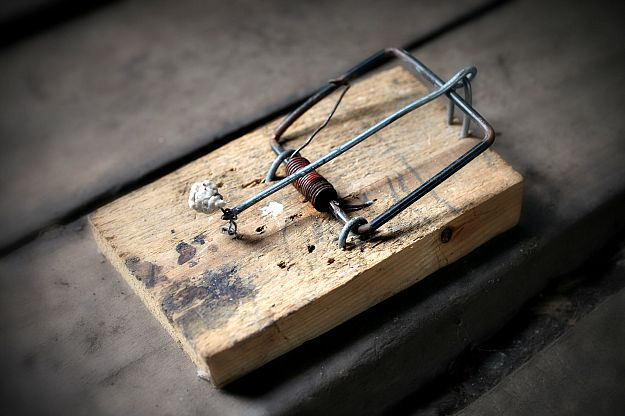
These rat trap and glow stick security “alarms” and instruction could be tripped by anyone or anything and needs to be reset afterward:
Rat Trap Security Alarm Supplies

- Rat Traps
- Glow Sticks
- Sturdy string or rope – about six feet of string or rope
- Power Drill
- Green and brown Spray Paint
- Rebar and hammer – optional
Instructions
- Drill two holes about a ½ apart on both sides of the center top and bottom of the rat trap. Make sure to drill the holes about a pinky finger width from the top to avoid splitting the thin wood of the trap.
- Mount it on a tree and spray paint the rat traps brown for camouflage.
- Spray paint the string or rope green so it blends in with the surroundings. Add a few touches of brown paint to the top part of the string which will dangle from the rat trap and hang down close to the tree.
- Lace the twine or rope through and through the bottom holes. Tie the ends of the string or rope firmly around the trap and knot it several times to help hold it firmly in place.
- Repeat this step at the top of the rat trap, but BEFORE you pull the lines tight, slide a glow stick through the string – essentially making it the middle of a string and rat trap “sandwich.” Now, pull the string or rope so it fits snugly around the tree and knot it into place.
- Tie another piece of string to the snapping mechanism and knot it into place. Then pull the string across down towards the ground and tie it off on a heavy rock, stick, or piece of rebar you have driven into the ground with a hammer.
- Carefully, set the rat trap in strategic areas around your perimeter.
Watch this glowstick alarm video tutorial by National Geographic:
How It Works
When a person (or possibly an animal) trips the string or rope in the dark, the rat trap is released – hitting the glow stick. This will create a specific visual location as to where your perimeter is breached.
3. Signaling System

To create a silent signaling system, simply tie a piece of string to the glow stick with holes on one end and twirl it around in the air at night. Remember to read the details about the product before purchasing. Your silent communication signaling system could be devised to be color based depending on the type of threat. This will help the person on the other end to quickly understand the type of threat or emergency. Here are a few tips on how to use a glowstick for survival.
4. Pop Tab Fishing Hooks
No matter how much gear you are able to purchase and store, the stockpile will eventually run out. Gathering items, which would make excellent barter, should ALWAYS be a priority on your SHTF plan.
Supplies and Instructions:
- Pop tabs – that’s soda for all folks who didn’t grow up in Appalachia!
- Multi-tool
- Permanent marker
- Lay the pop tab on a hard surface.
- Draw a line with the permanent marker about three-fourths of the way from the base of the finger pull opening.
- Cut along the marker line.
- Use the file on the multi-tool to file the bottom tip of the opening you cut into a sharp point.
- Use the top hole in the pop tab to tie the upcycled emergency fishing hook on the line and start casting!
Watch how to make a soda can tab fish hook video posted by aleckirstein:
As long as there are potential threats, there will always be great and practical solutions that won't cost you so much. You will have to open your mind to the possibilities and put in the time, effort and dedication to come up with these spring prepper projects.

Do you have any more spring prepper projects you might want to add? Please add them in the comments below!
Here are Seven DIY projects for preppers you might want to learn!
Follow us on Facebook, Instagram, Twitter, Pinterest, and Tumblr!
The contents of this article are for informational purposes only. Please read our full disclaimer.
Editor’s Note – This post was originally published in May 2016 and has been updated for quality and relevancy.
-

 Paracord Projects1 year ago
Paracord Projects | 36 Cool Paracord Ideas For Your Paracord Survival Projects
-

 Paracord Projects1 year ago
How To Make Paracord Survival Bracelets | DIY Survival Prepping
-

 Medical Care1 year ago
21 Home Remedies For Toothache Pain Relief
-

 Knife Laws1 year ago
Are Switchblades Legal? Knife Laws By State
-

 Do It Yourself1 year ago
Survival DIY: How To Melt Aluminum Cans For Casting


Pingback: Four Prepper Projects to Try this Spring | Marlon Karda
Kate R.
May 29, 2019 at 10:53 AM
I enjoyed all these, the Dakota fire hole, all of it. Thanks for all the great information.