Archives
How to Treat an Open Wound
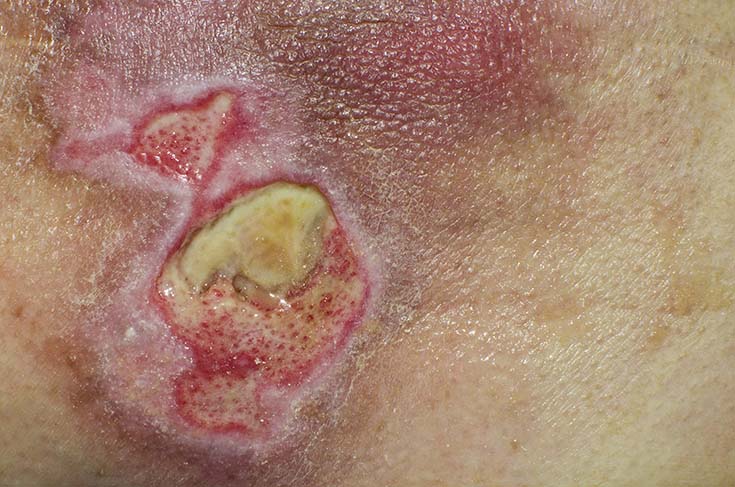
Do you know how to treat an open wound? If not, you need to learn. Treating open wounds and other types of emergency first aid will be one of the most important survival skills when SHTF.
Gaye Levy, the editor of Backdoor Survival, is an expert in all things preparedness. Today she's teaching you how to treat an open wound. Read on for her tips, and be sure to check out her website.
If there is one area that I feel singularly unprepared for it is with dealing with physical trauma following a disruptive event. Basic first aid? Sure, I can handle that and have a decent first aid kit to back me up. But open wounds, broken bones, and other physical traumas? Not so much.
The thing about physical traumas, and especially open wounds, is that they can occur anytime including right in your own home. An accident in the kitchen or the yard can begin with a bloody mess and end with an unwelcome infection. Who wants that?
As far as I am concerned, the moment is now. It is time to become educated and to start learning how to deal with more serious medical matters. To help us along, I welcome contributing author Joe Alton who is allowing me to share his expertise on how to deal with open wounds.
The Open Wound
Years ago, we held the first suture class for non-medical people in the preparedness community. Our purpose in doing this was to provide education that might be useful in a post-apocalyptic setting. We felt that teaching people medical skills may save some lives in long-term survival scenarios. To us, any unnecessary death in times of trouble is one too many.
Nowadays there are a lot of folks that put on these classes. The main goal, however, is not simply to learn the mechanics of throwing a stitch but to develop the judgment necessary to understand when a wound should be closed and, more importantly, when it should be left open.
When the medically-responsible person evaluates a wound, the following question must be asked: What am I trying to accomplish by stitching this wound closed?
Your goals when performing wound closure are simple. You close wounds to:
- Repair the defect in the body’s armor
- Eliminate “dead space” that can lead to infection
- Promote healing.
- Provide a pleasing cosmetic result (less scarring).
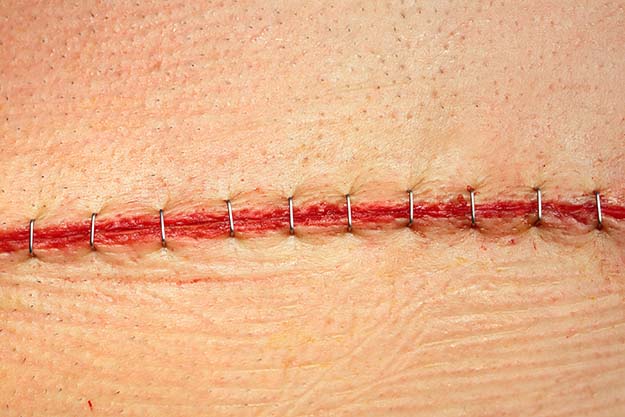
Take the case of a young woman injured in a “zipline” accident. She was taken to the local emergency room, where 22 staples were needed to close a large laceration. Unfortunately, the wound had dangerous bacteria in it, causing a serious infection which spread throughout her body. She eventually required multiple amputations.
We learn an important lesson from this tragic case: Namely, that the decision to close an open wound is not automatic but involves serious considerations.
Infected Cut
The most important of these is whether you are dealing with a clean or a dirty wound.
Most open wounds you will encounter in a wilderness or collapse setting will be dirty. If you try to close a dirty open wound, you sequester bacteria and dirt into your body. Within a short period of time, the infected wound will become red, swollen, and hot. An abscess may form, and pus will accumulate inside.
Here’s an article I wrote about infected wounds: Infected Wounds
The infection may spread to the bloodstream and, when it does, you have caused a life-threatening situation. Leaving the wound open will allow you to clean the inside frequently and observe the healing process. It also allows inflammatory fluid to drain out of the body. Wounds that are left open heal by a process called “granulation”; that is, from the inside out. The scar isn’t as pretty, but it’s the safest option in most cases.
Other considerations when deciding whether or not to close an open wound are whether it is a simple laceration (straight thin cut on the skin) or whether it is an avulsion (areas of skin torn out, hanging flaps).
If the edges of the skin are so far apart that they cannot be stitched together without undue pressure, the wound should be left open. If the wound has been open for more than, say, 6-8 hours, it should be left open; even the air has bacteria, and the injury may already be colonized.
IF you’re certain the open wound is clean, you should close it if it is long, deep or gapes open loosely. Also, cuts over moving parts, such as the knee joint, will be more likely to require stitches.
Remember that you should close deep wounds in layers, to prevent any un-approximated “dead space” from occurring. Dead spaces are pockets of bacteria-laden air or inflammatory fluid in a closed wound that may lead to a major infection. An exception to this is a puncture wound from an animal bite. These are loaded with germs and should never be sutured.
Improvised Butterfly Closure with Duct Tape
If you must close an open wound, use the least invasive method.
If you can approximate the cut edges of skin with butterfly closures, it is better than puncturing the skin again and again with sutures or staples. Use an adhesive such as tincture of benzoin to hold the tapes in place. Even Super-Glue may be a better option in certain cases, and is used routinely in underdeveloped countries like Cuba with good effectiveness.
Irrigating the Wound
The safest method, though, is to leave that questionable wound open.
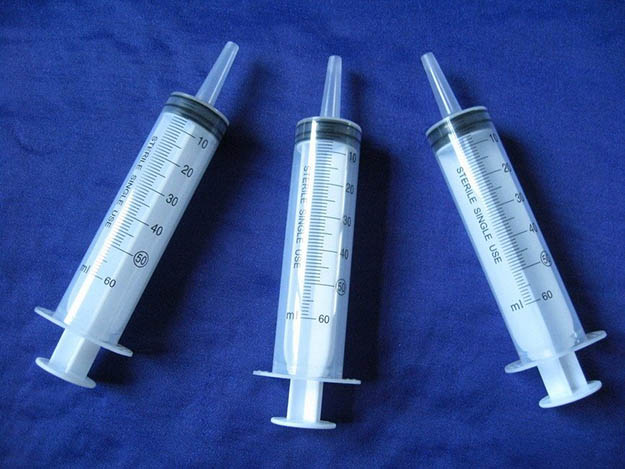
Using a 60-100cc irrigation syringe, flush the area aggressively with a dilute solution of Betadine(Povidone-Iodine) or sterilized saline solution. If you don’t have commercial sterile solutions, studies show that clean drinking water can keep a wound clean in an austere environment.
Place a sterile moist (not soaking wet) dressing in the open wound and then cover with a dry sterile gauze dressing. Replace the dressing at least daily, more often if possible.
If you have antibiotics, this may be a good time to use them. Check out the link in this article about infected wounds to see which are most useful.
About hydrogen peroxide, undiluted Betadine, or Alcohol as a cleaning agent for open wounds: If it’s all you have, it’s ok for the first cleaning before you place the dressing. These substances, however, tend to dry out newly forming cells and may actual hinder healing. As such, stick with milder solutions or clean drinking water for long-term wound care.
Learning how to suture is a useful skill. Knowing when to suture, however, is much more important.
Joe Alton, M.D., aka Dr. Bones “Doom and Bloom” Survival Medicine
Takeaway: Many Wounds Should Be Left Open
Before now, I was under the false impression the all serious wounds should be closed up or sutured to prevent infection. Little did I know that closing a wound, especially while out in the field, should be carefully evaluated if there is any hint of dirt or bacteria. Sometimes, closing a wound will foster an infection and make it worse. Who knew?
Here is the takeaway for determining whether a wound should be left open:
1. If the wound has been open for longer that 6 to 8 hours, leave it open. During that period, bacteria will have had time to work its way through the body, potentially causing a massive infection.
2. If the flaps of the wound cannot be closed without using a lot of pressure, leave it alone.
3. To repeat: dirt and bacteria will cause an infection if allowed to fester in a closed up wound. If there is any suspicion of such, leave the wound open!
The Final Word
After digesting Joe’s advise on open wounds, I pulled out my copy of his book, The Survival Medicine Handbook(written by Joe and his wife, Amy) to see what else it had to say on the subject.
Note: this is a big fat book of over 500 pages. I keep in next to my desk and use it as a reference, but I have not read it cover to cover.
In chapter six, I found lot of information on open wounds including photos and extensive details on the use of commercial hemostatic agents (such as Quickclot and Celox) and suture instructions for those hopefully rare times when suturing will be needed.
The book also mentions something I already knew and that is that it is a good idea to apply some triple antibiotic ointment to a healing wound or, as I prefer, raw honey, lavender oil or to Melaleuca (tea tree) essential oil. Lavender, especially, is something I always carry with me in my portable survival kit (see 8 Essential Items: The Perfect Portable Survival Kit).
At the end of the day, I am more than a little bit discouraged by how ignorant I am about wound control and other physical traumas. That said, as with everything preparedness related, there is always something new to learn and of course, it is never too late to start.
Want to know more? Check out these related articles:
Medical Preparedness: Treating a Wound
How To Treat Everyday First Aid Issues
Home Remedies For Preppers | SHTF First Aid
Enjoy your next adventure through common sense and thoughtful preparation!
Gaye
-

 Paracord Projects1 year ago
Paracord Projects | 36 Cool Paracord Ideas For Your Paracord Survival Projects
-

 Paracord Projects1 year ago
How To Make Paracord Survival Bracelets | DIY Survival Prepping
-

 Medical Care1 year ago
21 Home Remedies For Toothache Pain Relief
-

 Knife Laws1 year ago
Are Switchblades Legal? Knife Laws By State
-

 Do It Yourself1 year ago
Survival DIY: How To Melt Aluminum Cans For Casting






Anonymous
February 6, 2018 at 11:34 AM
that did not inform how to treat a wound
Art
July 7, 2018 at 12:32 PM
Two things: 1) An experienced EMT said bleeding is a good thing — up to a point of course. He said the blood coming out is carrying things that can cause infection with it — “if a wound is bleeding it’s clean”. So while you want to stop serious bleeding as quickly as you can, you need to make sure nothing comes in contact with the wound that could contaminate it. In other words, if you bind the wound with somebody’s T-shirt or anything else that’s not clean, you can trap bacteria, etc. in the wound.
2) Many years ago a Boy Scout was honored by the national organization for some quick thinking that saved a boy’s leg — maybe even his life. The boy had been chopping wood & accidentally hit the calf of one leg. The sharp blade sunk in deep, making a terrible wound which bled profusely. The Scout who was honored had needle & thread for sewing something like a rip in clothing, but certainly not sterile & sewing thru the skin was not an option. But the Scout also had a razor & some wide adhesive tape.
While others held the wound together, the Scout shaved the hair off the injured boy’s leg on either side of the cut, then prepared two strips of adhesive tape. Picture this — his took a strips of tape 2″ wide & lengthwise folded 1/4″ of the tape over onto itself (sticky side to sticky side). Then he put the strips on both sides of the cut & sewed the folded over portions together. Kinda like this:
___| |___ bottom lines = tape on either side of the cut; sew the upright portions together.
That held the cut closed until they could get the injured boy to a hospital. Later the doctor who treated the injured boy said that makeshift method kept the cut closed, stopped the bleeding & kept contamination out of the wound. Dr. said he’d never seen that method, but it was the best thing that could have been done in the situation.
William Snead
July 13, 2018 at 6:35 AM
I’ve always been told that unless blood is squirting, wash with clean water, sprinkle in Potassium Permanganate, pull close as best you can, then cover, if the injury is on the leg, and you have to get out of dodge on foot cover the covered wound with cardboard or or any hard but flexible material, to prevent continuous damage and keep out contamination, plus if you have honey use it under the bandage, keep checking the wound, light bleeding is ok as long as it remains clean you should only have to clean and redress daily, remember if dirt gets in clean ASAP.
Pingback: 11 Most Essential Wilderness First Aid Tips You Need To Survive | Survival Go Bag