Archives
Emergency Water Part 2: Purification
Water is the building block of all life on Earth. Without it, we can only survive a few days. That’s why it’s so important to have emergency water stored up in case of a disaster or SHTF scenario.
Gaye Levy at Backdoor Survival has written a four-part guide on emergency water for preppers. Check out the first part here, and read the second part below.
While sourcing water, and especially an adequate supply of water, is a challenge, making such water safe to drink is a whole other matter. There is much confusion relative to the best method to use to purify water.
Is it boiling, filtering, adding bleach, distillation, or something else? Truth be told, the answer is “it depends”. Over time, I am starting to believe that the answer you get is dependent upon who you ask and what interests they happen to represent.
In this article, Daisy Luther, responds to the water purification questions posed by readers in a recent Prepper Book Festival giveaway. Daisy, who is the author of The Prepper’s Water Survival Guide, is not tied to special interests and is diligent in her research. As I mentioned in Part 1: Acquisition, she is stepping up to answer your questions and hopefully bring clarification to this all important topic of water purification.
So once again, grab a cup or bottle of good clean water and let us begin with Part Two of “Emergency Water for Preppers”.
Emergency Water for Preppers: Purification
While all of the aspects of water preparedness are vital, often the most overlooked is purification. Sometimes people outside the prepping world don’t think about the fact that the water they manage to acquire could be teeming with dangerous bacteria, sediment, and toxins. Today I’d like to address your questions about water purification.
What is the number one water filter you would recommend?
I have two different favorites.
For in-home use, I love my Big Berkey. For any time I’m away from home, I carry a Sawyer mini. We keep the mini in our backpacks, purses, and vehicles and have at least one in our possession at all times – you just never know when you might need to filter water!
What do you think of steri-pens for disinfecting water?
Steri-pens are awesome, because they are small and easy to use. They can purify up to 8000 liters of water. They work with ultraviolet light and destroy 99.9% of the bacteria, viruses, and protozoa that could make you sick.
The potential downside of steri-pens is that they require a power source. Some, like this one, are powered by AA batteries, while others can be recharged by computers, solar panels, or a wall charger.
What do you think of the SODIS method of purifying water?
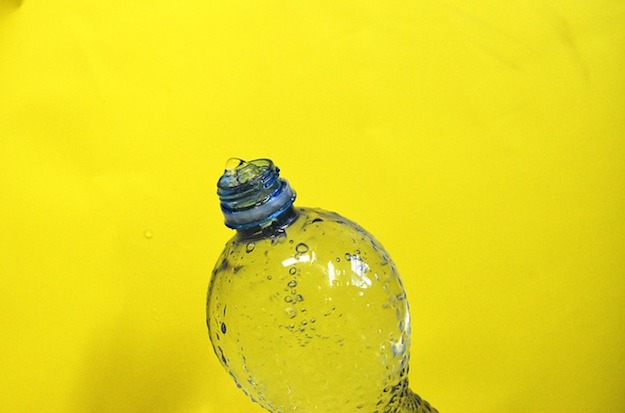
SODIS stands for solar water disinfection.
It’s pretty amazing. Put water into a PET plastic bottle (PolyEthylene Terephthalate, Recycle code #1), lay it in the sun for at least 6 hours, and boom – you have safer water. The beauty of the SODIS water purification method is that it costs next to nothing and is simple to do in nearly any location.
The outdoor temperature is irrelevant – the purification occurs from the exposure to UV rays. This is sort of like an off-grid steri-pen.
Some warnings: if the water is cloudy, you need to filter it before using this method. If the weather is cloudy or overcast, 2 days will be required to purify the water. Be sure that your plastic bottle is absolutely clear.
This method is approved by the World Health Organization, the Red Cross, and UNICEF. (source)
For those who are concerned about the exposure to petrochemicals or BPA in the plastic, the SODIS website says that as long as you use the PET plastic bottles, the amount of exposure to those and other chemicals will be insignificant.
While this might not be my number one choice for water purification, if I was in a situation in which I didn’t have the supplies to use other methods, this would be my fallback method.
Speaking of the SODIS method, you might want to read Gaye’s review of the Puralytics Solar Bag; I know she swears by it.
Is using a WAPI (water pasteurization indicator) really adequate for heating water to a safe enough level to drink?
There are pros and cons to water pasteurization indicators.
On the pro side, a WAPI can help in situations during which you need to save fuel, since the pasteurization point of water is lower than the boiling point. They are a reliable way to heat your water quickly. Since they’re small and inexpensive, they can be a great addition to a bug-out bag.
This being said, I’d normally just opt to boil my water, since boiling water is unmistakable and can’t malfunction. Rocket stoves take very little fuel to bring water to the boiling point. WAPIs are really just a matter of personal preference.
What is really the best way to make sure you have clean water: filter, distill, boil, bleach, pool shock?
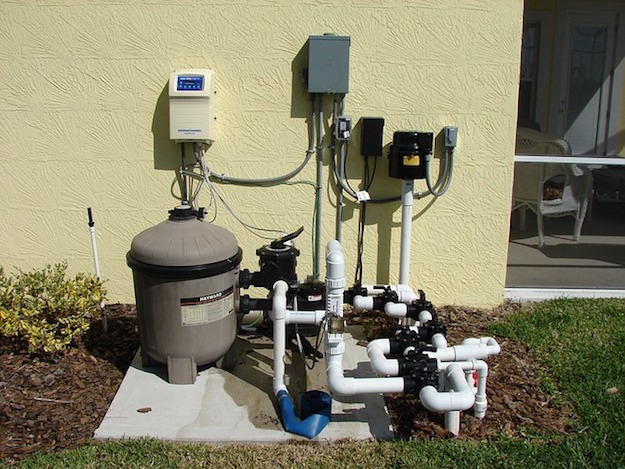
Distillation is probably the very safest method. When you’re capturing steam, you’ll have no debris or sediment, and the boiling required to make the steam will kill nearly all contaminants like bacteria, viruses, or protozoa.
The problem with distillation is that if water supplies are limited, you lose a lot during the process. This means it’s not the best method for every situation.
Water purification is always two-fold – you have to get rid of the chunks and you have to get rid of anything harmful living in it. If you are not distilling, most often it’s recommended to both filter and purify.
How do you use pool shock for potable water?
The great thing about storing pool shock instead of bleach is that you don’t have the limited shelf life of bleach. When a prep is this vital, you want it to be at full effectiveness when you need it the most.
Before using pool shock or any chemical purification method, filter any debris, particles and sediment out of your water.
Gaye has an excellent article with all the details on using pool shock to purify water. In summary, she wrote, “For my own use, I settled on 1 teaspoon of pool shock per gallon of water when making up my stock chlorine solution. Then, to disinfect water, I used 3/4 ounce of my pool shock solution to treat a gallon of water. This makes it easy to calculate how much to use, regardless of the size of your container.”
Always, always use eye protection goggles and gloves when dealing with caustic chemicals. If your water tastes funny, you can aerate it by pouring it back and forth between containers a few times.
How do you filter iron and sand from well water?
Reverse osmosis is one of the best ways to remove unwanted minerals from any kind of water, but in an off-grid scenario that isn’t going to do you much good. Not only are most RO systems grid-dependent, but they can also be outrageously expensive.
Carbon block filters (like the kind in the Berkey systems) are your next best option for removing sediment. The more sediment in your water, the more frequently you’ll need to replace your filters. Be sure to stock up on lots of extras. Berkeys are gravity fed and require no source of power to clean your water.
I have looked at my water heater as a 50-gallon source but our water has a lot of minerals in it. What is the best way to clean it up for consumption?
When harvesting water from your water heater, quite often the first water that comes out will be discolored and full of sediment. Reserve this for non-consumption uses like flushing the toilet. (Regularly flushing your water heater will help keep the sediment from building up too much.) Once the water runs clear, you can collect this for drinking water.
Once you’ve collected the water, you should still purify it and filter it through something like a Berkey filter to remove any debris.
If you have a heavy buildup of lime, calcium, or other minerals, the best method for making the water safe to drink is distillation.
My question is how to make an easier homemade distiller for water. This would be helpful if one can afford a fancy distiller, but still has concerns about water quality in a less than ideal situation.
Gaye has chosen to answer this one so let me turn things over to her:
I was lucky enough to receive an advance copy of Jim Cobb’s newest book, Prepper’s Survival Hacks. In it he addresses the question of how to build your own solar still. Even though his book is not slated for publication until mid to late September, both Jim an his published have granted me permission to share his hack for building a survival still.
And just so you know, I agree 100% with Jim. This is not something I would do when SODIS or some other method is more productive.
SOLAR STILL
I’m going to be flat-out honest with you. I don’t in any way, shape, or form endorse the use of a solar still for acquiring water in a survival situation. I’m including it here for two reasons.
1. In any survival manual, it is almost expected that the solar still be mentioned, and its absence in this book would be noticeable.
2. I wanted to include it specifically so I could talk a bit about why you shouldn’t rely upon it.
MATERIALS
Shovel
Bucket or clean container
Large plastic tarp
Large rocks or logs
Small rock
#1 On the surface, the solar still is a fairly straightforward project. Using your shovel, dig a hole a few feet deep. At the bottom of the hole, roughly in the center, place your bucket or other clean container. Next, stretch the plastic tarp across the top of the hole using the large rocks or logs to secure it in place. Finally, place a small rock at the center of the tarp, which weighs it down above your container.
#2 The idea is that the sun will heat up the inside of that hole, causing moisture from the ground to evaporate, then condense on the bottom of the plastic tarp. It will then run along the plastic to the point above the bucket, into which it will drip.
Here’s the thing. The amount of water you’ll gain through the use of the solar still is, quite literally, a drop in the bucket compared to the amount of energy you’ll expend by digging the hole and setting everything up.
Don’t believe me? Go ahead, set one up tomorrow and see how well it performs. If you get more than 2 cups of water, you’ll be doing fairly well.
What would you recommend for a budget conscious first water filtration system?
If you want one of those pricey systems but can’t afford it, you can actually build your own version of a gravity filtration system. All you need are some basic tools, a couple of food grade buckets, and 2 or 4 Berkey filters.
I have not made this myself but have been present when someone else did, and it absolutely works like a Berkey. We did the dye test after he made it and the DIY system passed. This is a good short term solution.
When you can manage it, I recommend upgrading to a ready-made high quality filter made with stainless steel, but this will get you through in the event of an emergency.
~~~~~~~~~~~~~~~~~~
The Final Word
Sometimes the pursuit of knowledge results in more questions than answers. I hope that is true in this case because the more you ask, the more you learn. The more you learn, the better prepared you will be following a disaster or other disruptive event.
Going forward, there will be an article answering your questions about water storage (Part 3 Emergency Water for Preppers: Storage) as well as a round up article providing you will links to some of the best articles on the web written by my preparedness blogging colleagues. Plus, in case you missed it, here is Part 1, Emergency Water For Preppers: Acquisition.
As I mentioned in Part 1, one thing you can count on is that over time, I will continue to introduce you to strategies and resources that will help ensure that you have an adequate supply of water to help you maintain both hydration and sanitation, no matter what.
Want to know more? Check out these related articles:
Water Collection Using a Plastic Shopping Bag
Prepper Tips | Tricks to Hide Your Water Storage
Enjoy your next adventure through common sense and thoughtful preparation!
Gaye
-

 Do It Yourself7 months ago
Paracord Projects | 36 Cool Paracord Ideas For Your Paracord Survival Projects
-

 Do It Yourself9 months ago
How To Make Paracord Survival Bracelets | DIY Survival Prepping
-

 Do It Yourself9 months ago
21 Home Remedies For Toothache Pain Relief
-

 Do It Yourself10 months ago
Survival DIY: How To Melt Aluminum Cans For Casting
-

 Exports8 months ago
Are Switchblades Legal? Knife Laws By State








Pingback: Purifying Water in a Survival Situation | SL
mark
October 2, 2017 at 12:45 PM
This is a very informative and interesting post. I am getting with this many information. but i think use a revers osmosis water filter is the best way to easily filtering water.All other procedures are more difficult.thanks a lot. Keep writing.
Lori L Peters
January 27, 2018 at 2:33 PM
Is there any Non Chemical treatment that would work in place of the bleach or pool shock?
Pingback: How To Make Your Own DIY Water Filtration System | Survival Life
Pingback: Bug Out Bag | Emergency Situation Preparedness | Survival Life
Pingback: Top Survival Skills | Learn Now, Survive Later | Survivallife
Pingback: Best Bug Out Bag List
Pingback: Best Bug Out Bag List - Survive!
Pingback: Best Bug Out Bag List | My Blog
Pingback: Plastic Bottles | Turning Garbage Into A Survival Tool | Survival Life
Pingback: 8 Emergency Water Storage Tips For Preppers Like You | Survival Life
Pingback: DIY 5-Gallon Water Filter | Primitive technology
Pingback: DIY 5-Gallon Water Filter – Survival NEWS
Pingback: Improvised Survival Gear | 7 DIY Projects for Preppers | Survival Life
Pingback: Improvised Survival Gear | 7 DIY Projects For Preppers – Ultimate Survival Alerts
Pingback: 15 Homemade Weapons That Are REALLY Badass [2nd Edition] | Survival Life - Cooking in Quarantine
Pingback: 15 Homemade Weapons That Are REALLY Badass [2nd Edition] | Survival Life – Bulletproof Survivors
Pingback: 15 Homemade Weapons That Are REALLY Badass [2nd Edition] – End Survival
Pingback: 15 Homemade Weapons That Are REALLY Badass [2nd Edition] – brandname