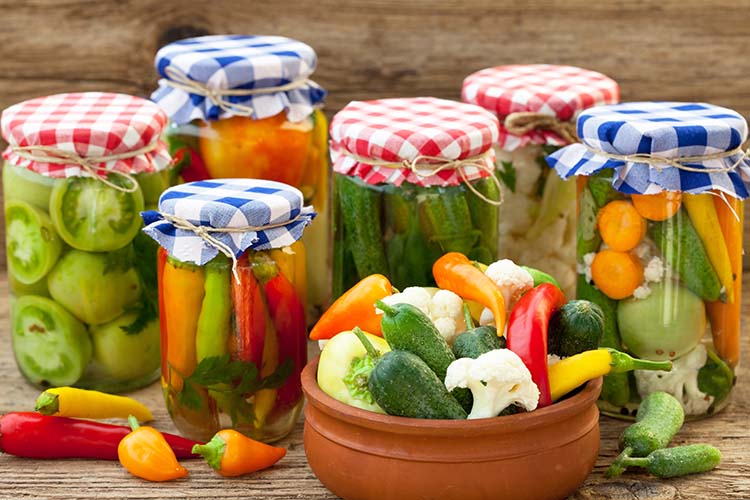


Canning is a great way to preserve your summer harvest. This article will take you step by step to becoming a canning pro in no time!
The How-To Guide to Canning Like a Pro
In my previous article, I listed the supplies needed to get every homesteader well on their way to having a great canning experience this year. Now that you have a complete list of the supplies you’ll need (listed in my previous article), let’s go over the complete canning process. From start to finish, I’ll break it down step by step and before you know it, you and your family will be enjoying your harvest in a whole new way this season.
I will also share a couple of delicious canning recipes that are easy to make that your whole family will love!
Here are a few of the things we’ll cover in this article…
The complete canning process:
- Organize your canning supplies
- Sterilizing lids/jars and making filling
- Filling your jars
- Processing your jars in a water bath
And these two delicious canning recipes that are perfect for any beginner!
- Triple Berry Jam
- Quick and Easy Dill Pickles
Let’s get started by making sure we’ve got all our supplies in order…
Organize Your Canning Supplies
Lay out all of your supplies before you begin – jars, lids, pots, towels, the ingredients for your recipes, etc. It’s a much smoother process when you have everything you need laid out and organized.
Make sure all the food prep work is complete before you begin. Chopping and de-seeding, for example, can be time consuming, and it’s a great idea to get that part out of the way before you begin.
Also, start boiling the water needed for your canning recipes and for the sterilization process
Sterilize Jars & Make Filling
In order to ensure that no bacteria gets trapped in your jars, you need to sterilize them. The easiest way to do this is to submerge them in boiling water for about 10 minutes. Make sure to throw in the lids only (not the rings). This will also soften the rubber on the lids so that it gives you a good seal.
For jams and jellies, this sterilizing process is the perfect amount of time to put your jam in a separate pot and let it boil. For salsa, this gives you time to process the ingredients and have it ready to go in the hot jars. The trick here is to time things so that when the jars come out hot, you will fill them with your ingredients. To retrieve the hot jars you can use regular tongs, being sure to carefully dump the hot boiling water out of them. Then set the hot jars on a towel so that they don’t come in contact with your cold counter top.
Fill Your Jars

Filling jars is an important part of canning. Use a wide mouth funnel and ladle to fill your jars. Typically, for things like salsa and jam, anywhere between 1/4 inch to 1/2 inch is perfect. This is called “head space,” so if you read something that talks about head space, it just means the amount of unfilled jar.
Make sure there are no air bubbles trapped in your jars. You can get rid of air bubbles by swiping a butter knife around the inner rim of the jar. The starter canning sets have a handy tool that measures your head space and also gets rid of air bubbles.

- A basic canning kit. (Image via)
Once your jars are filled, you will want to wipe them down to be sure there is NO filling left on the rims. Anything left on the rim of the jar could compromise your seal, so make sure you wipe them well using a wet paper towel. Once your jar rims are wiped clean, put your sterilized lids on.
After you put the lids on, it is time to put the rings on. You will want to tighten the rings to “two fingers tight.” Basically until you can no longer tighten the jar with your pointer finger and thumb.
Process Your Jars in a Water Bath
- Lift the rack in your canning pot (it should still be boiling).
- Set the sealed jars on the rack and submerge them in the water. Make sure that your jars are fully submerged and have at least an inch of water above them.
- Put the cover on the pot and boil for whatever amount of time your recipe calls for. (Typically most jams, jellies, and salsa recipes call for about 10 minutes.)
As the jars are boiling, you can use this time to prepare your next ingredients or wash the tools to make your next batch. Once the jars have processed, you will remove them using your jar lifter. The jars will be very hot, so you will want to set them on a towel once again. You should have one towel for sterilized jars and one towel for finished jars.
You may notice that once you remove the jars from the pot, you will hear pinging noises. That sound means your jars are sealing.
You can test the seal on your jars by simply pressing your finger on the middle of them. If they “click” or move at all, they did not seal. Do not try to store these jars outside of refrigeration or they will go bad. Sometimes jars take some time to finally seal. If they still haven’t sealed after 24 hours just place them in the fridge.
That’s all there is to it!
Now, let’s talk canning recipes! These two recipes are gems, and perfect for beginning canners.
Triple Berry Jam
Ingredients:
- 3 cups of strawberries
- 1 1/2 cups of blueberries
- 1 1/2 cups of raspberries
- 3/4 cup of organic cane sugar
- Zest of 1 lemon
- 2 tsp of lemon juice
Instructions:
- In a large heavy pot, combine the berries and sugar; let them sit for 1-2 hours until the sugar has dissolved into the fruit and created a syrup.
- Place the pot on the stove top and turn burner to medium heat. Bring mixture to a boil and then reduce the heat to medium-low, stirring often until the fruit breaks down and the mixture starts to thicken slightly about 30-35 minutes. You can use a masher to break the fruit down even further if you don’t like a super chunky jam. Just before the jam is down, stir in lemon juice and zest. When the jam is almost done, it will still be a little loose (it will firm up as it cools), but should coat the back of a wooden spoon.
- Remove the jam from the stove and pour into 3 clean half-pint size glass jars. Cap and cool completely on the counter before transferring jam to the refrigerator for 4 weeks or freeze for up to 6 months. Makes 3 jars.
Quick and Easy Dill Pickles
Ingredients:
- 6 cups of cider vinegar (5% acidity)
- 6 cups of soft tap water or bottled distilled water
- 1/2 cups of canning salt or non-iodized table salt
- 1/2 cups of sugar
- 9 small cloves of garlic, peeled and halved
- 6 fresh dill seed heads each about 4 inches in diameter; separated into thirds; 8-12 flowerettes each
- 2 tsp of mustard seeds
- 6 lbs of pickling cucumbers; each 3-4 inches long
Instructions:
- In a 5-6 quart stainless steel or unchipped enamel pan, combine vinegar, water, salt, and sugar; bring to a boil over medium-high heat.
- Meanwhile, put three garlic-clove halves, 2 pieces of dill, and 1tsp of mustard seeds into each of six prepared, hot, wide-mouth quart jars. Pack cucumbers firmly into hot jars, leaving 1/2 inch headspace. Top each jar with an additional piece of dill. Pour hot vinegar solution over cucumbers, leaving 1/2 inch of headspace. Gently run a narrow nonmetallic spatula between cucumbers and jar sides to release air bubbles. Wipe rims and threads clean; top with hot lids, then firmly screw on bands. Process in boiling water canner for 15 minutes. Or omit processing; let stand for 12-24 hours at room temperature, then refrigerate. Makes 6 quarts.
Do you have any favorite canning recipes of your own? Share them with us in the comments below!