

All the emergency and disaster preparedness in the world means nothing if you don’t know the basics of survival skills like building an emergency shelter!
Emergency Shelter | A Step-By-Step Guide
Learn This Survival Skill and Never Be Without Shelter!

1. The first thing you will need is a ridge pole. Your pole should be very sturdy and as long as your height, plus your arm extended in the air.
2. Prop the ridge pole up on one end to give your feet extra room. You may also prop it on the ground, although not giving the pole the additional height creates a triangle with the ground that reduces your foot space.
3. Lay down on the ground and measure how long your ridge pole needs to be and mark out where your body is. It’s important to create a shelter that is the right size for you. You need to be able to fit in the shelter without having too much extra space. This is especially important when you’re stuck out in the cold. Your shelter needs to be small enough that your body temperature can heat the space and keep you nice and warm.
4. If the space inside is just enough, and there is not much room to move around, you did it right!
5. You will also need some Y-sticks to prop up the ridgepole at the other end. Make sure the Y-sticks are really solid and grounded – this is your framework. If you push your weight down on the Y-sticks and it falls over, you’ll need to find sturdier sticks.
6. The next thing you need to do is insulate yourself from the ground. Avoiding direct contact with the ground will help you maintain a more comfortable body temperature.
7. Leaves serve as a great insulator, but you will want to put them in before you build up the rest of the shelter.
8. Keep in mind that the leaves are going to compress. Make sure the compressed material beneath you is at least four fingers deep.
9. Now you need to add ribs to your debris shelter, which will provide structure on the sides and will give support to the leaves that will go on top.
10. Your ribs should be strong. Dead branches should work okay as long as they do not break or crumble. There will not be a ton of weight on the ribs, but the stronger the branches the smaller the chance that your shelter will fall apart.
11. You also want them to be fairly close together and not to extend very high above the ridge pole. If it rains and the ribs are too tall, water will penetrate the leaves and run inside the shelter. If the ribs are roughly the same height as the ridge pole, water will run down the sides.
12. The ribs do not necessarily have to be identical in size. As the triangular shape gets smaller towards the other end, shorter branches will fit in perfectly. If you come across a log with a large bend, make sure the curve stays on the outside. If the bend falls to the inside, it will take up a lot of space inside your shelter.
13. To prevent the leaves from falling off of your shelter, place smaller branches with the ends pointing up to help support the leaves.
14. Once you are finished with the ribs and lattice, you may add the leaves on top to insulate the shelter and help capture the body heat escaping from you.
15. Leaving the entrance open will allow heat to escape. A great option is to create a doorway and close it off as much as possible to reduce the amount of heat escaping. This will also allow you to build the leaves up and over the doorway.
16. To construct the door, gather four Y-sticks and create a framework on either side of the entrance. The purpose of the doorway is to reduce the size of the opening, so place them where there is just enough room for you to wiggle your way inside.
17. Once the Y-sticks are grounded, put sticks across the top and along the sides to finish off the frame.
18. Now you can add the last bit of leaves around the doorway. Be sure to start building from the bottom and work your way upward to prevent leaves from falling through.
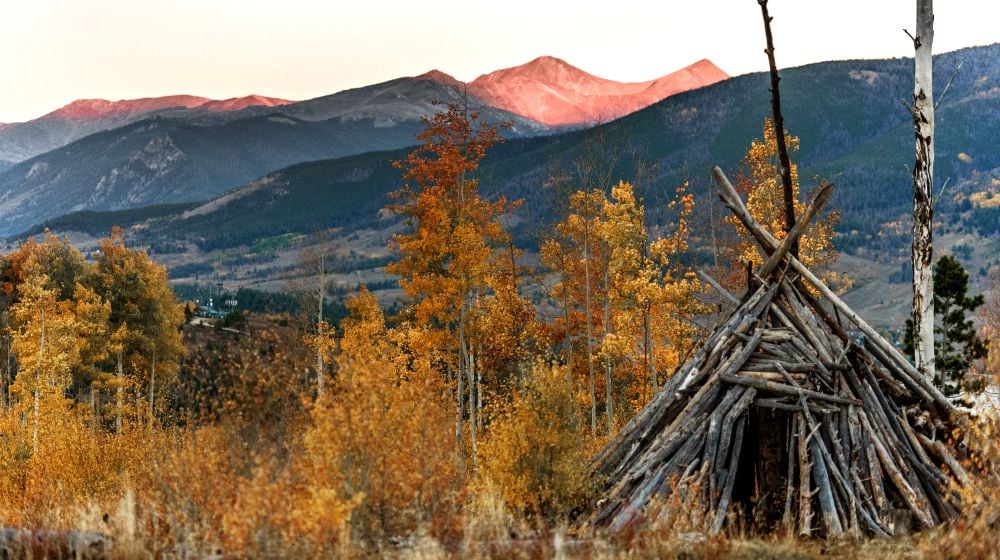
19. When you have finished constructing the debris hut, crawl inside on your back, feet-first, and you’ll be all set in your shelter!
Watch this video by NorwegianBushcraft for another great idea on building an emergency shelter specifically during the winter time:
Our friend Dave Scott, who you may know from the Bushmaster Bible, is back again to teach you the best tips for your survival arsenal. Through his time as an instructor at the Earth Native Wilderness Survival School, Dave has become an expert on all things survival. We hope you enjoyed this post stuffed with his awesome tips to build an emergency preparedness survival shelter, which you can build with nothing more than what you can find in nature.
What do you think of this tutorial on building a DIY emergency shelter? Do you have other ideas on making temporary emergency shelters? Share your thoughts in the comments section below!
Up Next: DIY Super Shelter: Live Like a King in the Outdoors
Editor’s Note: This post was originally published on May 9, 2014, and has been updated for quality and relevancy.