Do It Yourself
Paracord Projects | Solid Gear Wrap

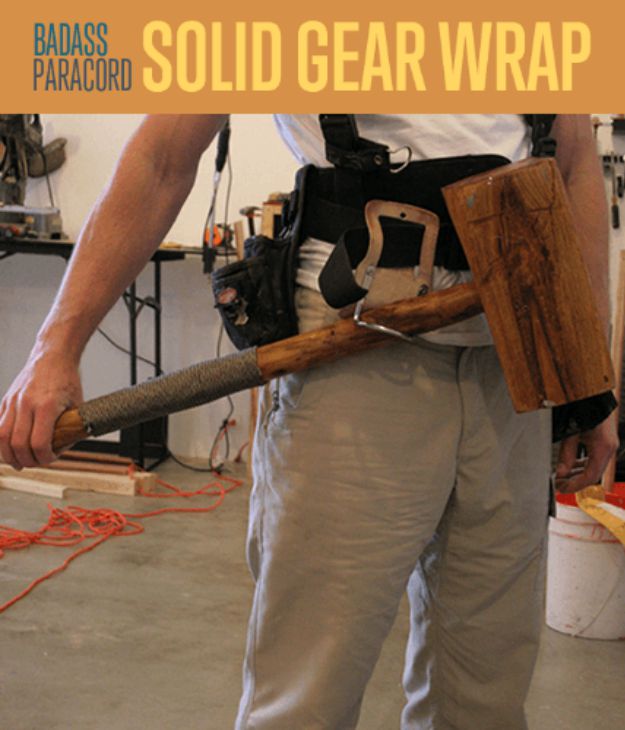
Running out of paracord projects? This grip will make your tools, gear, and weapons more comfortable and easier to handle.
RELATED: 36 Awesome Paracord Projects For Preppers
Badass Paracord Projects | Paracord Solid Gear Wrap
Paracord Project for Your Tools
Are your tools and weapons always slipping out of your sweaty palms? Does your hand get tired of drawing your war hammer, only to watch it go flying and land at your enemy's feet?
Are these follies the result of you not keeping up with your hand grip routine like you said you would? It's because you didn't look into the best paracord projects and learn how to make a badass paracord solid gear wrap.
Make this paracord weave for all sorts of survival gear and tools. Check out the super easy instructions below.
Materials for this Badass Paracord Solid Gear Wrap:
- A tool with a solid handle
- Spool of Paracord
- Scissors
- Pliers
- Lighter
Let's Begin.
Step 1: Ready Your Tool
Grab the tool you want to make a solid gear wrap on.
Step 2: Begin Your Loop
Make a long loop that is the length that you want your wrap to be, then pinch the string into place with your thumb.
Step 3: Start Wrapping
Wrap the Paracord around the beginning of the loop so that it remains in place.
Step 4: Continue Wrapping the Tool Handle
Continue wrapping the Paracord tightly down the handle of your tool until the loop is almost covered.
Step 5: Cut the String
Cut the end of the string with a pair of scissors.
RELATED: Paracord: Everything You’ll Ever Need To Know
Step 6: Thread the String
Thread the string through the remaining end of the loop.
Step 7: Tighten the Loop
Use pliers to pull the string at the beginning of the wrap. This will tighten the loop at the other end.
Step 8: Cut Excess String
Cut the excess string at both ends.
Step 9: Melt the String Ends
Use a lighter to melt the ends of the string.
Step 10: Flatten the Melted Ends
With your scissors, flatten the melted ends of the string so that they mesh with the rest of the Paracord.
Step 11: Test Wield
Wield your tool without embarrassing yourself.
Want to see more cool paracord projects? Check out this video by The Weavers of Eternity Paracord Tutorials about how to make a Swiss Army knife case:
This is a very easy paracord project yet it's clear how useful it is if you use your tools a lot. No more slippery handles and use your hammer or other tools with confidence.
All you need is a spool of paracord then follow the simple instructions above.
How's this for a nice paracord project to spend some of your extra time? Share us your thoughts in the comments section below!
UP NEXT:
- How To Make Paracord Survival Bracelets | DIY Survival Prepping
- Top 10 Reasons To Never Leave Home Without A Paracord Bracelet
- How To Build Your Own Underground Bunker For Survival

Editor’s Note: This post was originally published on May 25, 2014, and has been updated for quality and relevancy.
-

 Paracord Projects1 year ago
Paracord Projects | 36 Cool Paracord Ideas For Your Paracord Survival Projects
-

 Paracord Projects1 year ago
How To Make Paracord Survival Bracelets | DIY Survival Prepping
-

 Medical Care1 year ago
21 Home Remedies For Toothache Pain Relief
-

 Knife Laws1 year ago
Are Switchblades Legal? Knife Laws By State
-

 Do It Yourself1 year ago
Survival DIY: How To Melt Aluminum Cans For Casting


Pingback: Paracord: Everything You’ll Ever Need to Know | Prepper News
Pingback: Paracord: Everything You'll Ever Need to Know - Survival Life | Preppers | Survival Gear | Blog
Pingback: Paracord 101 | Survival Life
Pingback: 25 Paracord Projects, Knots, and DIY Ideas
Pingback: Paracord: Everything You’ll Ever Need to Know | Survival Life
Pingback: Paracord: Everything You’ll Ever Need to Know - Survive!
Pingback: Paracord: Everything You’ll Ever Need to Know | Online Colleges