Fitness
How to Make Compost | DIY Composting
We hate love to break it to you – compositing isn’t just for farms! This gardening technique has become a very popular practice in both urban and rural settings. To top it all off, it is one of the most simple, cost effective, eco-friendly contributions we can give back to mother nature.
If you’re anything like us, you’re all about reducing costs, recycling and reusing materials. A DIY compost pile is so easy, and we hope this article provides some useful tidbits to get your composting pile started:
What is compost, exactly?
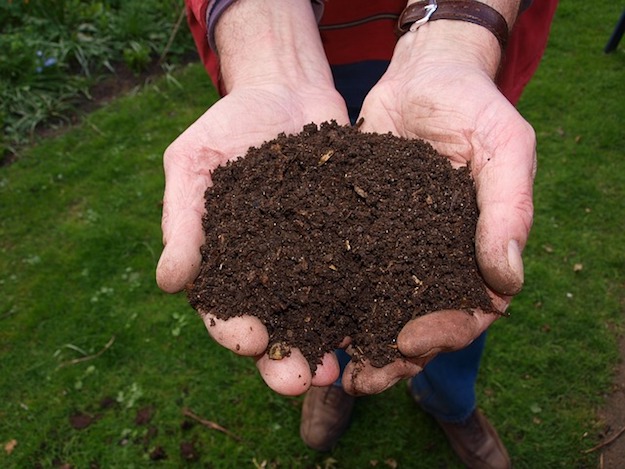
Glad you asked! Compost is decayed organic material used as plant fertilizer. Also known as ‘Gardener’s Gold’ or ‘Black Gold!’ The act of compositing transforms waste, or recycles waste, into nutrient-rich soil.
How does composting work?
Bacteria is what drives the compost train. They break down materials and create carbon dioxide (CO2) and heat. The temperature of the pile rises as they consume the compost materials. Compost piles can get up to 100 to 140 degrees Fahrenheit as it brews!
Critters such as worms, slugs and insects also digest the decomposing matter, pooping out finished compost as they munch their way through. Their secretions improve compost’s texture, binding small particles into larger crumbly bits.
(See more about composting at Live Science)
What can be composted?
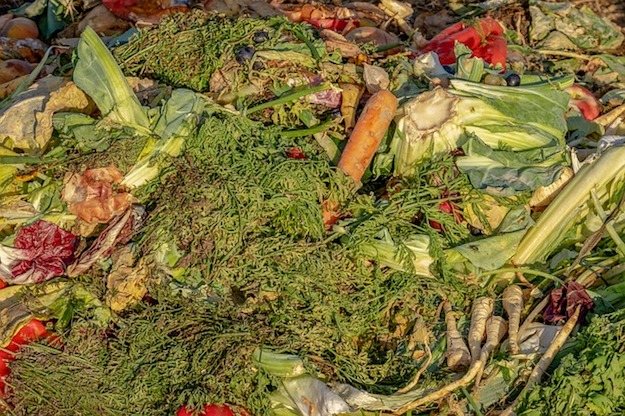
Lucky for you, the list seems endless! Here is a list of some compostable items you may have around the house:
Can’t get enough? Here’s a list of 81 items you can compost:
1. Dryer lint
2. “Dust bunnies”
3. The insides of a vacuum bag (just empty the bag into the compost bin)
4. The contents of your dustpan (just use discretion)
6. Coffee filters
7. Tea bags/loose leaf tea
8. Soy/rice/almond/etc milk
9. Nut shells (but not walnut, which may be toxic to plants)
10. Pumpkin/sunflower/sesame seeds (chop them to ensure they won’t grow)
11. Avocado pits (chop them up so they won’t sprout)
12. Pickles
13. Stale tortilla chips/potato chips
14. Stale crackers
15. Crumbs (bread or other baked goods)
16. Old breakfast cereal
17. Bran (wheat or oat, etc)
18. Seaweed/nori/kelp
19. Tofu/tempeh
20. Frozen fruits and vegetables
21. Expired jam or jelly
22. Egg shells
23. Old, moldy “soy dairy” and other dairy substitutes
24. Stale Halloween candy and old nutrition/protein bars
25. Popcorn kernels (post-popping, the ones that didn’t make it)
26. Old herbs and spices
27. Cooked rice
28. Cooked pasta
29. Oatmeal
30. Peanut shells
31. Booze (beer and wine)
32. Wine corks
33. Egg cartons (not Styrofoam)
34. Toothpicks
35. Q-tips (not the plastic ones)
36. Bamboo Skewers
37. Matches
38. Sawdust
39. Pencil shavings
40. Fireplace ash (fully extinguished and cooled)
41. Burlap sacks
42. Cotton or wool clothes, cut into strips
43. Paper towels
44. Paper napkins
45. Paper table cloths
46. Paper plates (non wax- or plastic-coated)
47. Crepe paper streamers
48. Holiday wreaths
49. Balloons (latex only)
50. Raffia fibers (wrapping or decoration)
52. Old potpourri
53. Dried flowers
54. Fresh flowers
55. Dead houseplants (or their dropped leaves)
56. Human hair (from a home haircut or saved from the barber shop)
57. Toenail clippings
58. Trimmings from an electric razor
59. Pet hair
60. Domestic bird and bunny droppings
61. Feathers
62. Fish food
63. Aquatic plants (from aquariums)
64. Dog food
65. Rawhide dog chews
66. Ratty old rope
67. The dead flies on the windowsill
68. Pizza boxes and cereal boxes (shredded first)
69. Toilet paper and paper towel rolls (shredded first)
70. Paper muffin/cupcake cups
71. Cellophane bags (real cellophane, not regular clear plastic)
72. Kleenex (including used)
73. Condoms (latex only)
74. Old loofahs (real, not synthetic)
75. Cotton balls
76. Tampon applicators (cardboard, not plastic) and tampons (including used)
77. Newspaper
78. Junk mail
79. Old business cards (not the glossy ones)
80. Old masking tape
81. White glue/plain paste
To read more, click here!
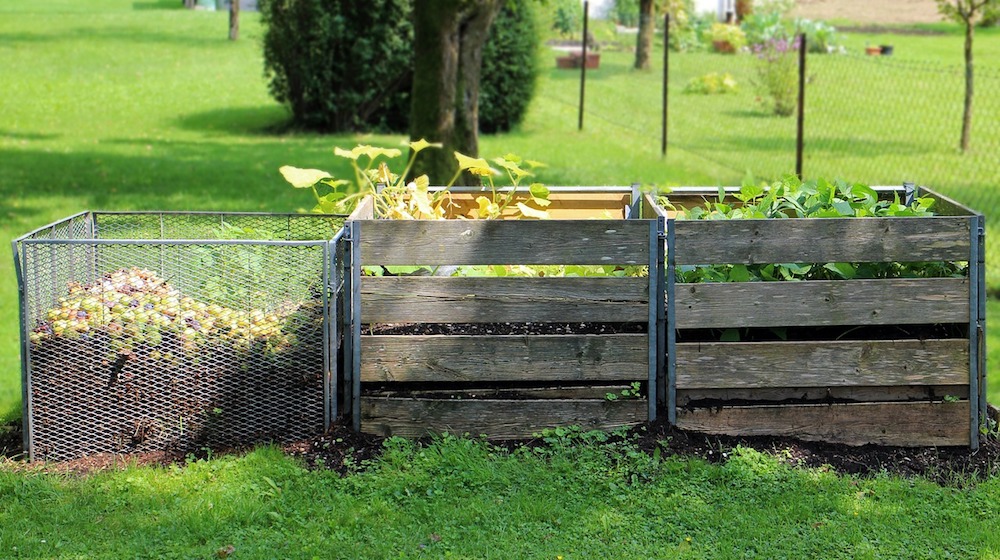
How do you get started DIY composting?
Here are some pretty nifty tips to have the most successful compost pile:
- Start on bare earth. This allows organisms from the ground (like worms and bacteria) to access the soil and begin doing their part of the process.
- Shred your leaves. Shredding results in premium mulch that is much easier to transport. If you are having an unsuccessful heap, you can easily remedy the problem by shredding, which allows for greater aeration of the pile.
- Add a nitrogen supplement. Manure is one of the best nitrogen sources for your pile, but you an also use hay and kitchen scraps. Layering your nitrogen sources will produce the best results.
- Turn your heap every three to four days. Some may recommend turning your pile every three weeks, but turning it every few days will guarantee composting success. Because your leaves have been shredded, they are much lighter and fluffier, making them easy to handle.
- Consider a compost bin or tumbler. These are not necessary, but convenient for small yards where a more compact pile would be more preferable. Tips 1-4 still apply when using a bin or tumbler.
(See full article from Compact Power Equipment Rental)
Check out these related articles:
The Art of Seed Saving
Conquer the Frontier Like An American Pioneer
Best Trades To Know When The SHTF
Once You Have Your Compost, It’s Time to Garden!
Click here to get Survival Seeds Playing Cards for free*! These cards tell you what, when, and how to grow your plants. Don’t miss out on this limited time offer: http://t.survivallife.com/get-growing-22607 *$2.95 s&h not included*
Like this post? Be sure to like us on Facebook so you can be the first to know about latest survival tips and off the grid living skills.


-
 Do It Yourself7 months ago
Paracord Projects | 36 Cool Paracord Ideas For Your Paracord Survival Projects
-
 Do It Yourself9 months ago
How To Make Paracord Survival Bracelets | DIY Survival Prepping
-
 Do It Yourself9 months ago
21 Home Remedies For Toothache Pain Relief
-
 Do It Yourself10 months ago
Survival DIY: How To Melt Aluminum Cans For Casting
-
 Exports8 months ago
Are Switchblades Legal? Knife Laws By State
Barbara Kelly
June 9, 2014 at 1:49 PM
Since my age doesn’t do for bugging out. Don’t think I could last that long. So what I’m doing is canning and dehydrating our food in preps. Nothing of this has been mentioned. Also we do have our water covered. And I do have chickens and a garden a fairly good size garden. I’m looking at any other alternatives
Lyn
June 9, 2014 at 4:57 PM
When I was a teenager, my father made a compost in our backyard from autumn leaves, grass clippings, hay, horse manure, lime, and kitchen garbage. He layered but left it alone all Winter without turning it. It created a create beginning for our Spring/summer garden. Why did it work for him without the turning I keep reading is necessary?
Pingback: Vermiculture - Worming Its Way Onto Farms Everywhere - Survival Life | Preppers | Survival Gear | Blog - Survival Life | Preppers | Survival Gear | Blog
Pingback: 13 Everyday Items For Survival - Survival Life | Preppers | Survival Gear | Blog - Survival Life | Preppers | Survival Gear | Blog
Pingback: Grow Your Own Organic Garden | Survival Life | Blog - Survival Life
Pingback: Preparing Your Spring Garden Now | It's Never Too Early!
Pingback: 6 Surprising Uses for Old Tires | Survival Life
Pingback: 6 Surprising Uses For Old Tires - Survive!
Pingback: 6 Surprising and Creative Uses For Old Tires | survivalisthandbook.com
Pingback: 6 Surprising Uses For Old Tires – Ultimate Survival Alerts