Do It Yourself
How to Make Soap
How to Make Soap
DIY “Cold Process” Soap You Can Make At Home
I’m going to make some homemade soap using a very simple, basic recipe. I use my own homemade soap and I’m running low, so I’m going to make a quick batch.
Here’s what you need:
- Plain, standard vegetable oil; nothing fancy
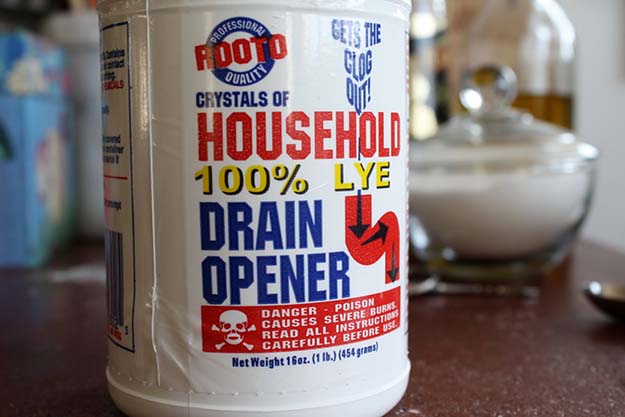
- 100% lye (sold as drain opener)
- A measuring cup — ONLY use Pyrex glass!
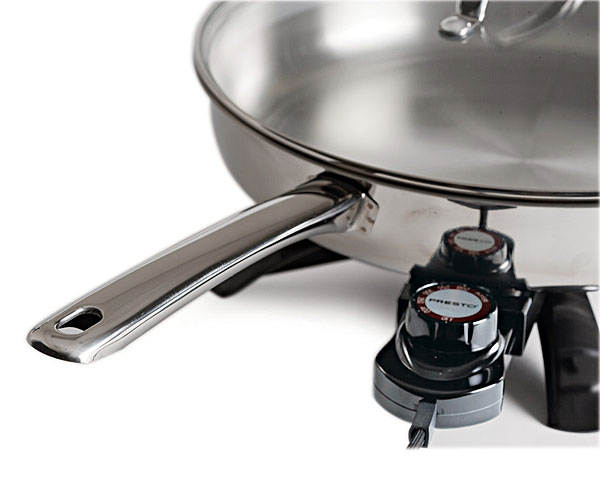
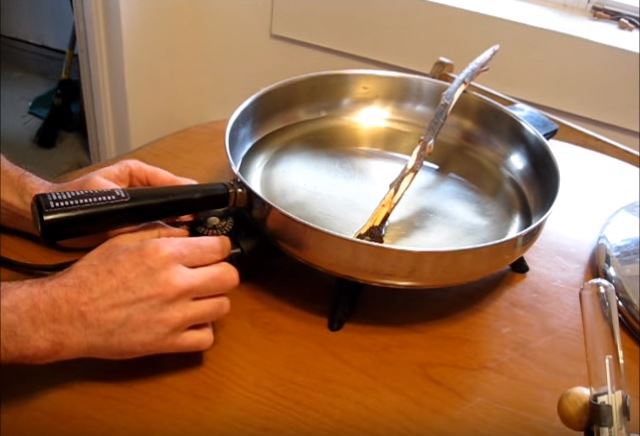
- Something to heat with. A lot of people use the stove, but I find it’s very hard to get the right temperature. An electric like this one has a dial so you can get the right temperature. You want to cook the soap to around 100 degrees, so this makes it convenient.
- Safety goggles
- Gloves
- Long sleeves
- Long pants
Those last four items are because lye is extremely caustic and can melt your skin. When working with this stuff, be extremely careful.
My recipe calls for 16 ounces (2 cups) of vegetable oil. Again, this is a very very simple formula I’m making here. Measure out two cups of oil, then pour it into your pot or skillet.

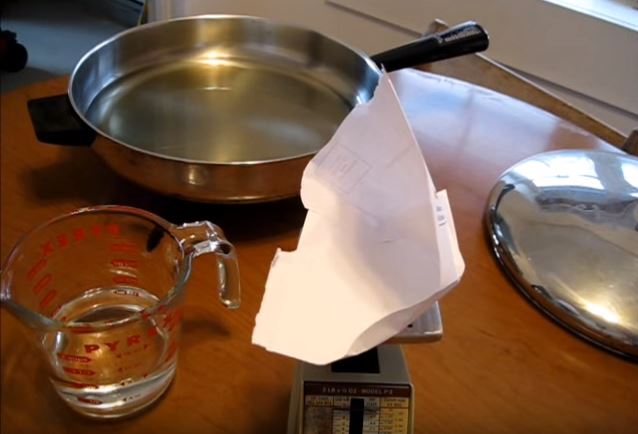
Next, carefully measure out 8 ounces of water and 2 ounces of lye. You want to have a good kitchen scale and make sure it’s zeroed out before you measure your lye.
The best way to do this is to place a paper envelope on top of your scale and pour your lye into the envelope. (I cut off the corner of a used mailing envelope.) You don’t want to use metal or good kitchen utensils, since the lye is caustic and will destroy what it touches.
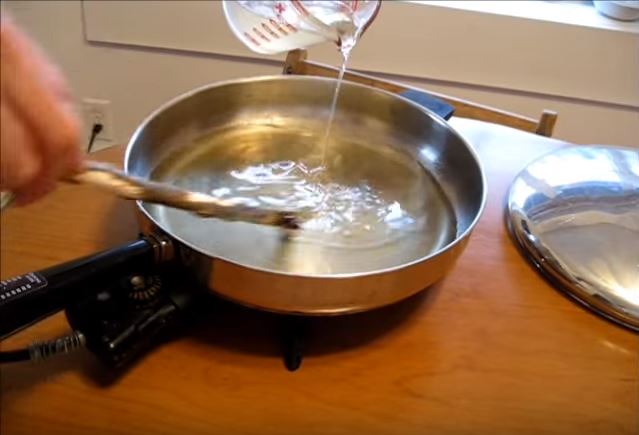
Now in this next step you must be very very careful. Mix your lye into your water. Never pour the water into the lye. Put the lye into the water, a little bit at a time.
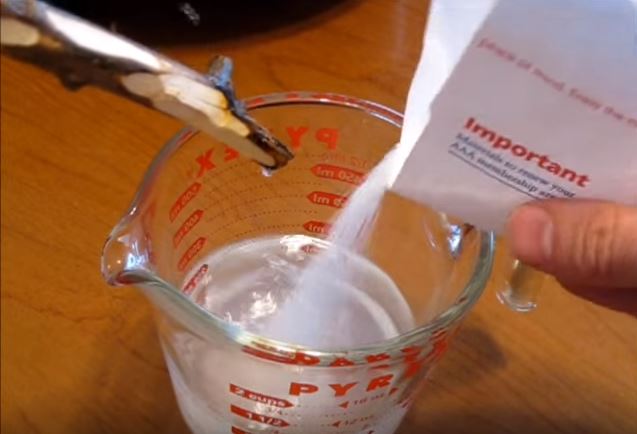
You’ll notice I’m using a stick. to stir with I have lost too many stirring spoons in the past to being dissolved, and I learned to use a stick.
Stir in a tiny tiny bit of lye at a time. You’ll notice already this little bit of lye is bubbling. This gets extremely hot; be very careful working with water and lye. There’s a chemical reaction that goes on here. I should also note you should have ventilation where you work; this gives off some very poisonous gases.
Next, I’m going to set a thermometer inside and let that sit until it’s down to 100 degrees.
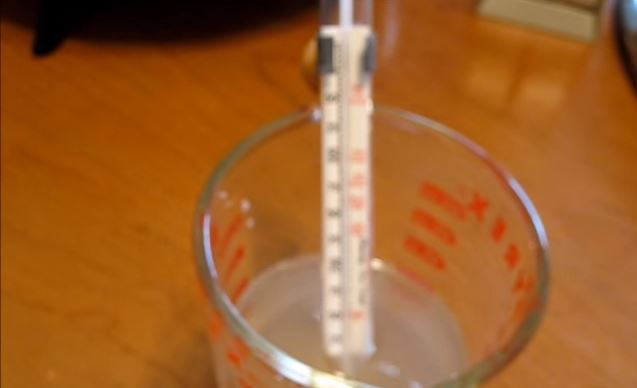
I’m going to preheat the oil to 100 degrees. This thermometer starts at 160, so it’s a little bit of guesswork.
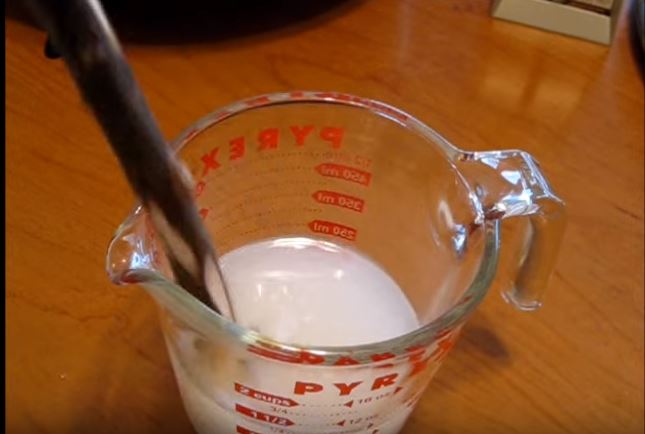
OK, my oil is heated up. Now very slowly, very carefully add your lye mixture to your oil.
Now it’s just a matter of continuously stirring until you get what’s called “trace” (when oil and lye water have emulsified.) This will take a while. What’s important right now is to continuously stir. This could take anywhere from 15-20 minutes to a half hour, sometimes longer depending on the situation. For me it’s always been different; there are too many variables involved. Some people use an electric hand mixer for this process. It’s your preference. I don’t like to make a mess or risk spilling.
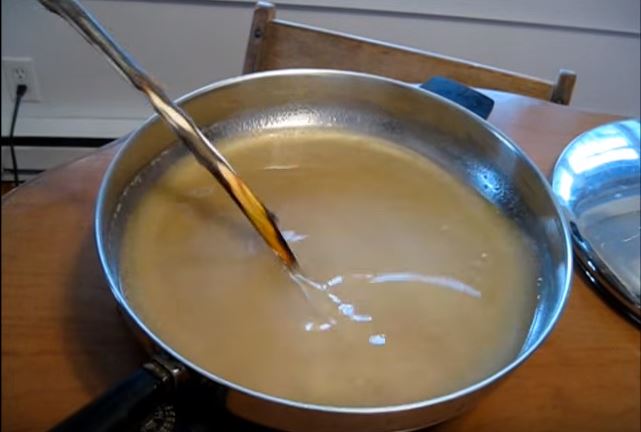
I’ve been vigorously stirring for about 15 minutes now. You’ll notice the oil mixture is getting thicker. There are little particles floating in it – those are little particles of soap forming. You can see some foam starting on the edges, and you can see a lot more little particles of soap forming inside here. It’s getting there.
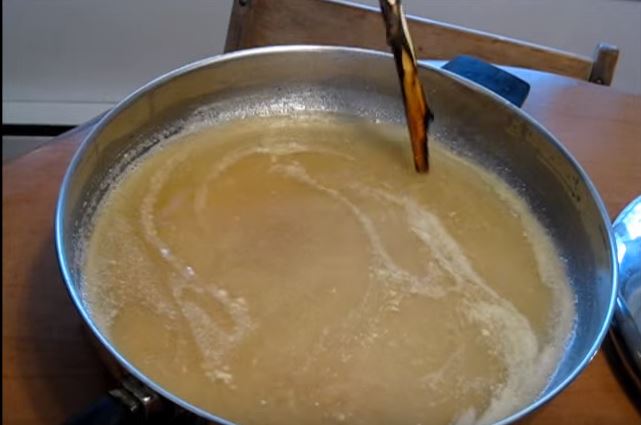
About 15 minutes later, you can see a whole lot more foam forming on the top.
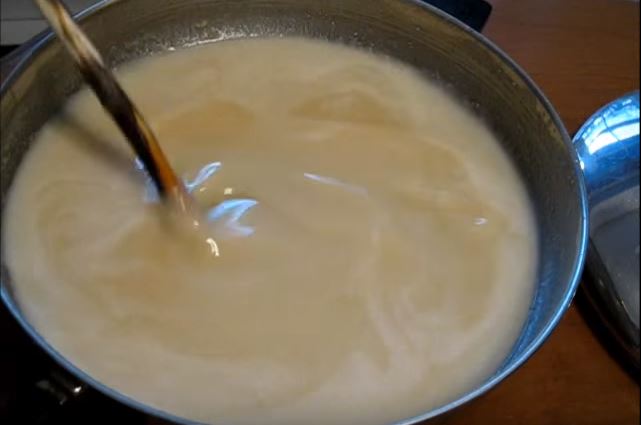
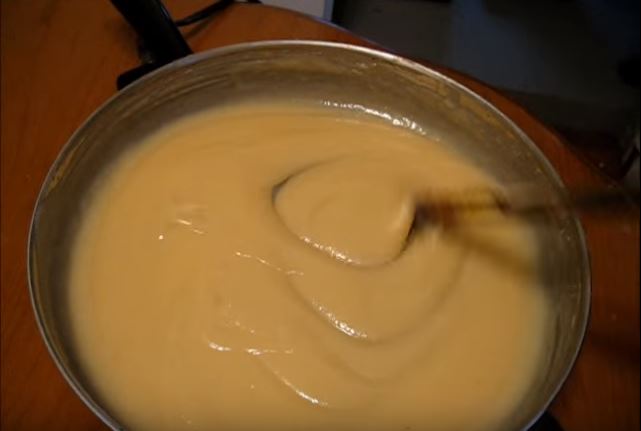
10 minutes later, it’s becoming almost more like cream in appearance, and you can see the liquid is not settling as fast behind my stir as it was before. There’s a soapy sheen on the surface now.
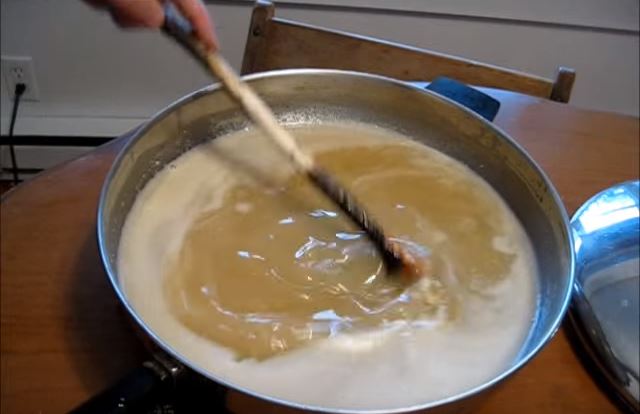
A while later, the surface is starting to look like applesauce now. You can see this has become very thick now. This is called trace. When you stir it, you can see the tracks left behind. It is now ready to be poured into the mold.
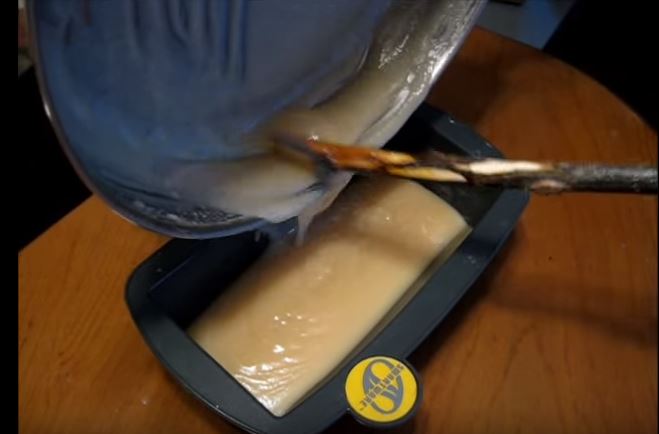
What I have here is a silicon bake mould. I use that because I happened to get it for free and it can take the 170 degree temperatures of the soap.

Now I’m not making anything spectacular here, this is just for me to use privately, so I’m just going to scrape right out of the bowl into the mould.
Now that the batch of soap is “done,” let it sit overnight with a towel wrapped around it. Cover the top and let it slowly cool down and cure overnight.
After 24 hours, remove the soap from the mold and slice it into soap bars. Then let the soap sit and cure for 6-8 weeks until all of the lye has been worked out and all of the oil has been converted to soap. At that point, you can use it as normal body soap, bath soap or dish soap.
The advantage of cold process soap like this over hot process is that it’s still liquid-like and you can get a very smooth surface on the soap if you want. The hot process soap is lumpy-looking, rough and coarse. A lot of people prefer the cold process because, although it takes longer to cure, you get a nicer looking bar of soap.
Do you have any soap making experiences of your own to share? Tell us about them in the comments!
Want to learn more? Follow us on Twitter and Facebook for the latest survival tips and news.


![Feature | Men's wearing black drinking water in the mountain | How To Stay Hydrated While Hiking [ Video]](https://survivallife.com/wp-content/uploads/2016/05/Mens-wearing-black-drinking-water-in-the-mountain-Stay-Hydrated-us-Feature-.jpg)


-

 Do It Yourself7 months ago
Paracord Projects | 36 Cool Paracord Ideas For Your Paracord Survival Projects
-
 Do It Yourself9 months ago
How To Make Paracord Survival Bracelets | DIY Survival Prepping
-
 Do It Yourself9 months ago
21 Home Remedies For Toothache Pain Relief
-
 Do It Yourself10 months ago
Survival DIY: How To Melt Aluminum Cans For Casting
-
 Exports8 months ago
Are Switchblades Legal? Knife Laws By State
Pingback: 13 Survival Tips We Learned From The Great Depression
April Jasso
June 27, 2018 at 4:31 PM
Very nice! I’m going to try this at some point-thank you!