Do It Yourself
Make a DIY Survival Water Filter | Survival Tips
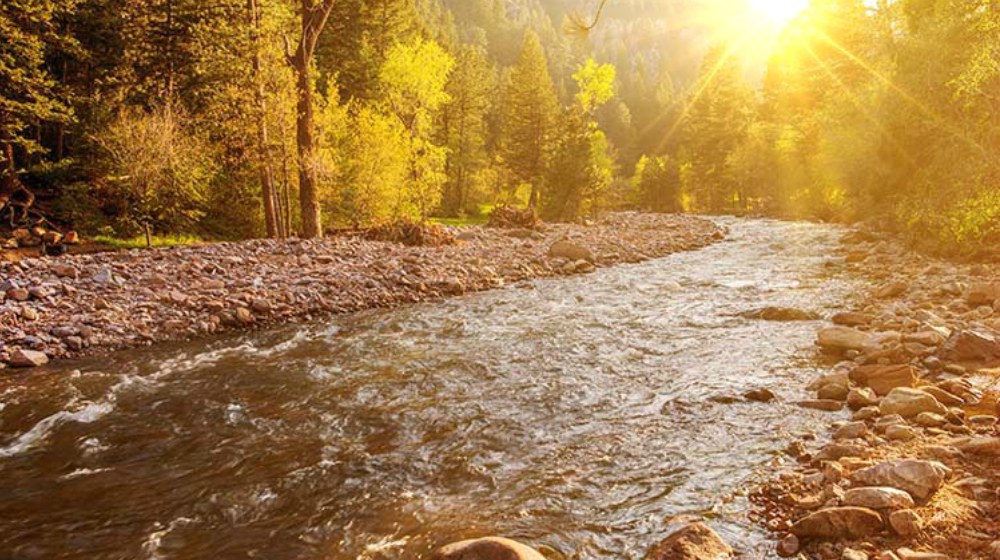
A water filter plays an essential role in survival when you bug out or are stuck in the wilderness. There is nothing more important than water. While being able to drink water is a must for survival, take note that you need to drink clean water only. Check out how to make your own water filter in the wild below.
DIY Survival Water Filter | 12 Easy Steps to Make Your Own
Why Is a Water Filter Important?
Water comprises most of our body: the brain (75%), the bones (22%), muscles (75%), the blood (92%) and more. We can go on and on about the benefits of water but when you are out in the wild, you cannot drink it straight from a stream or river. Just because it looks fresh and clear doesn’t mean it is. You need a water filter to remove bacteria and other contaminants. Otherwise, you compromise your health and chance of survival.
The ability to make your own water filtration device is an essential survival skill. You can only rely on yourself and your own skills to make it through when living in the wild. It’s not enough to rely on your eyes to determine if water is safe to drink. You’ve come far enough to get out of a compromising situation alive. You shouldn’t risk your life now by drinking water straight from the source. The only way to be sure you’ll live to fight another day is if you only drink clean and safe water.
What You’ll Need:
- Rocks
- Sand
- Charcoal
- Grass
- Juice bottle (as a container)
Step 1: Put Holes at the Bottom of Your Filter
In this case, we put holes in the cap of the juice bottle. You will need some holes in the cap to give some airspace.
Step 2: Large Rocks
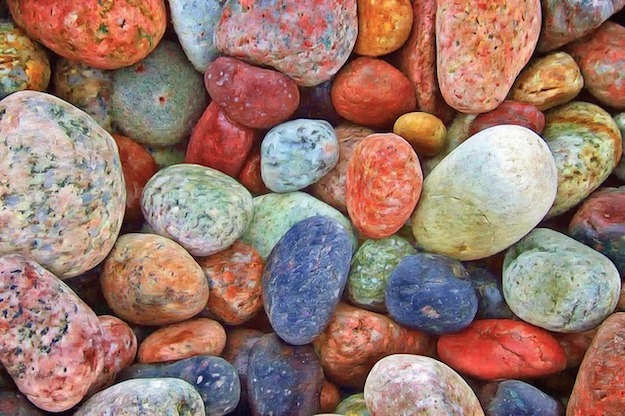
Large rocks give airspace for the survival water filtration process.
Step 3: Medium Rocks
Lime is a good example of medium rocks. It is used to help the water filter absorb dirt and bacteria from the dirty water.
Step 4: Small Rocks
Small stones are also important in the survival water filter because they block dirty particles from passing through.
Step 5: Layer of Sand
Sand is the finer filter for your survival water filtration system. So if you are making a water filter, remember not to forget adding a layer of sand.
Step 6: Coals
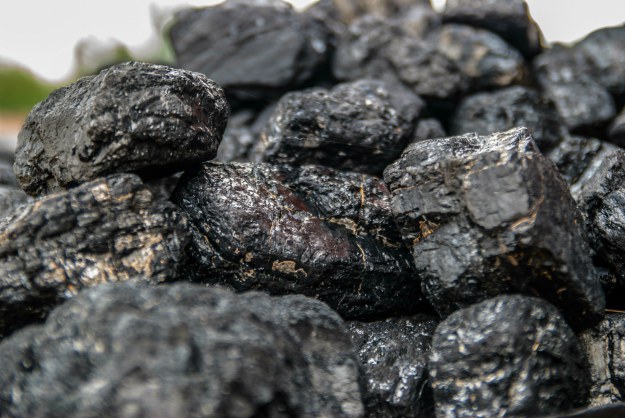
Charcoal from hardwood is the material of choice for your survival water filter.
Step 7: Another Layer of Sand
The second layer of sand on top of the coals is needed for even more effective filtration.
Step 8: Fresh Grass
The grass is also a good alternative to cloth for your improvised filter.
Step 9: Egyptian Well
Before using your DIY survival water filter, make an Egyptian well.
Step 10: Get Some Water
The water from the well is ready for your survival water filter.
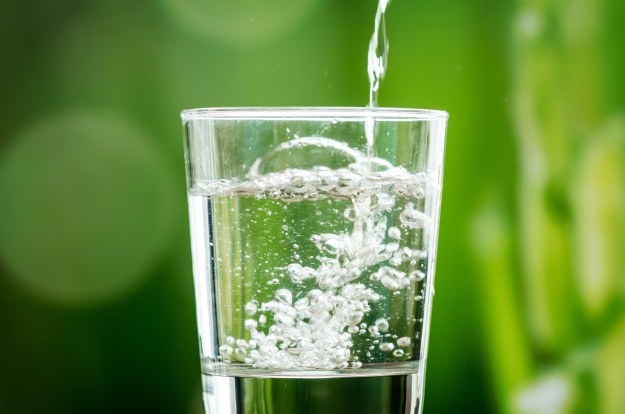
Step 11: Pour Water into the Filter
You need to repeat the process to make the water cleaner. Set the filter above a glass or cup, and pour the water into the filter. Enjoy seeing the layers saturate the water until it drops slowly to your glass or cup.
Step 12: Drink and Enjoy!
Watch the video below by Survival HT and see how to make a survival water filter in action:
As the video above states, a DIY filter for water should only be used if you cannot find a better, cleaner water source. Remember, your health and life are the top priority. After all, you’re a survivalist.
We hope you enjoyed our tutorial on how to make a DIY survival water filter. If you have any tips of your own, share them with us in the comments section below!
Up Next: DIY Pocket Water Filter
Editor’s Note: This post was originally published on January 12, 2015, and has been updated for quality and relevancy.
-
 Do It Yourself7 months ago
Paracord Projects | 36 Cool Paracord Ideas For Your Paracord Survival Projects
-
 Do It Yourself9 months ago
How To Make Paracord Survival Bracelets | DIY Survival Prepping
-
 Do It Yourself9 months ago
21 Home Remedies For Toothache Pain Relief
-
 Do It Yourself10 months ago
Survival DIY: How To Melt Aluminum Cans For Casting
-
 Exports8 months ago
Are Switchblades Legal? Knife Laws By State
That Guy
January 12, 2015 at 8:48 AM
I don’t think that the Egyptian Well will make the water safe to drink with out heat or uv treatment but will help to filter out debris. Don’t drink straight out of an EW.
Zyxomma
February 3, 2015 at 9:32 AM
I have a Lifestraw, but it’s always good to know other means of cleaning dirty water. Health and peace.
Edmond Macaraeg
February 3, 2015 at 10:00 AM
I would not recommend drinking the water from that “filtration” system. The rocks, sand, lime, leaves, etc. used would most likely be contaminated with impurities (since they have not all been sterilized in the first place), and thus, all of those impurities in them would simply be passed on to the water to be drunk!
left coast chuck
February 3, 2015 at 3:20 PM
Absolutely correct. You don’t know who or what peed on the rocks, sand and grass or how long ago. Without being cooked in water raised to over 165º you are taking a chance. Before using any of the substances mentioned in the article I would boil them in water first and then try to keep them as clean as possible after that. I would boil them after each filtration too. I’ve had salmonella and without antibiotics I probably would have died. I had the brown drizzlies within 20 minutes after eating. I could feel the food racing through my bowels. After a week of that action and after having lost about 20 pounds, the Navy corpsman decided maybe I needed hospitalization. After three or four days on antibiotics the bowel action died down. Had to have I.V. fluid infusion. I was one sick puppy. Maybe I am just gunshy, but I am really, really careful about drinking water after that and food sanitation. If in doubt, boil it and then boil it again.
Sharon
February 6, 2015 at 9:48 PM
To sanitize by boiling the water temp must reach 212 degrees for a minimum of 5 minutes. That is the boiling point. Absolutely not a good pick off the ground filter process with out sanitizing the contents. Poisonus leaves or animal feces in sand and so many other possibilities. I would recommend everyone check out “The Russian Hacker” on Youtube. Although he is not posting for survival alone…..his hacks for boiling and or cooking with few supplies are a need to know.
Left Coast Chuck, Although you did list one Salmonella symptom as a 20 yr veteran in Restaurant operations and sanitation, you could not possibly exhibit symptoms in 20 min. That was last nights or yesterdays dinner. Textbooks tell you 10-12 hours but even severe cases take at least 6-8 hours to start giving tell tell signs.
Dean
February 3, 2015 at 11:50 AM
Dysentery anyone?
Vincent King
February 3, 2015 at 1:54 PM
I would boil it first or let sit in the sun for 4 hours before filtering.
Danny Pruitt
February 3, 2015 at 2:34 PM
Or better yet, get a “steri-pen, which uses UV light to kill all the nasty germ/bacteria, etc in the water, after you filter it throuth the filter
Whiskey Sierra
February 3, 2015 at 5:26 PM
As apart of our Boy Scout Wilderness Survival Merit badge program and just basic bushcraft training, we teach the Scouts an easy to demonstrate, multi-step method to take absolutely disgusting water and purify it. We use extra large mayonnaise jars to teach this. First, fill the first jar about two thirds full of water. Then put in a fist full of gravel, dirt and woodland debris, close the jar and shake it thoroughly.
Steps one & two: settling and skimming – let the water sit for several minutes so the heavy particles sink to the bottom and the light particles float to the top. Carefully skim the floating trash off from the top.
Steps three & four: decanting and gross filtering – gently pour the water into a second jar being careful not to mix in the settled sludge from the bottom of the first jar. Use a bandana over the top of the second jar to filter out large particles of silt and any remaining detritus.
Steps five & six: fine filtering & boiling – Using a pump filter, fine filter the still murky water into a third jar. This water should now be fairly clear and ready for the final step, boiling. Boil the water for 1 minute and 1 more minute for every 1000 feet you are above sea level.
Steps seven & eight – cooling & aerating: Let the clean water cool to ambient temperature, then shake the jar of water vigorously to aerate the water and give it some oxygenated taste again.
There you have it; a system to take the most putrid water and make it safe and fit for drinking. Enjoy!
left coast chuck
February 4, 2015 at 12:42 AM
Gravel, I can understand, but why dirt and loose debris? The objective is to settle out the dirt and debris in the water to begin with, why add more? Why not just put gravel in the jar and shake it to settle large debris and then use the kerchief to strain out junk? I was originally going to post that rather than pouring the water through all the junk from the ground, the young lady in the picture would have been better off straining the water through the sleeves of the shirt she is wearing. First one sleeve and then once again through the other sleeve and then boiling the water. Boil, boil, boil. Even in the most primitive conditions, water can be boiled, even if one doesn’t have a fireproof container. One can heat rocks to boil water in a non-fireproof container. This works with many containers, although I am sure plastic would not stand up the regime. Our indian friends used to heat liquid in baskets using the hot rock technique.
Whiskey Sierra
February 4, 2015 at 12:34 PM
Left Coast Chuck, the whole idea is to teach the Scouts that water scooped from raw sources, even shallow puddles where gravel may get scooped up too, can be totally cleaned for safe drinking. So we intentionally make our samples as dirty and thick with natural debris as we can so the Scouts learn the lesson. Also, the US Department of Defense and the CDC confirm that you DON”T have to boil, boil boil the water. One minute at a full, rolling boil then one more minute for every 1000 feet in altitud, is ALL you need to boil water. Letting the water cool down from 212F in the hot container keeps killing pathogens. The CDC site explains all this. Our Scouts know how to clean any water, including water with chemical pollution in it. Now that’s teaching our youngsters to Be Prepared!
John Tischler
February 4, 2015 at 8:20 AM
Very usefull and important info. NO WATER,NO LIFE!
Greg Brown
May 11, 2019 at 3:37 PM
I would really need water to drink that water
Jenny Chen
June 23, 2015 at 1:32 AM
Great post.Thanks for sharing!
Invest on a good home water purification system. It will benefit your family’s health and safety. I bought filters from this Seller on Amazon and they work great. I just ordered a replacement system and i’ll let y’all know the quality when i get it!
http://www.amazon.com/Charcoal-Filters-Replacements-Keurig-Possiave/dp/B00X9805GO/
Pingback: DIY 5 Gallon Water Filter - Survival Life
Pingback: Cool DIY Projects for Survival | DIY Projects
Pingback: Survival Life's Ultimate List Of Survival Hacks And Skills
Pingback: Survival Skills Everyone Should Know And Be Able To Do | Survival Life
Pingback: 35 Survival Uses of Tampons ( Feminine Pads to the Rescue) - Stubble Patrol
Jumpoff A
December 14, 2017 at 12:43 PM
After reading all the comments here, I must say the vast majority of the comments here really missed their mark. It just so happens that I know this young lady and I must say that she is SPOT ON! Everyone should listen to what she has said and remember that she did advise that after obtaining your filtered water that it should be boiled to kill any pathogens.
Speaking as an ex-Army ranger and instructor in survival methods I highly recommend that you take notes from this video and understand how to make such a filtration system like this for yourself. The Grass is to filter out the large contaminates, which the grass can be tossed after being used and you can resupply yourself with new, fresh supply of grass. Otherwise you can use a cloth as your first filter. Remember, to dry it out so that it doesn’t become contaminated with mold, mildew or other contaminates. You can use a sock as your cloth.
Next, to have charcoal or coal itself. Do you know how to make your own charcoal? I suggest you learn how to make it. Otherwise, if you live in Tennessee you can find coal just about anywhere or you can bring it from home.
The sand acts as micro barrier. It allows the water to pass through, but, not microorganisms. The rocks allow the water to pass through but not the other barriers (in great quantity). Remember, it was suggested that when you first use this type of filter to pass it through once more so that any contaminates from the rocks and other barriers are washed clean. Then it is suggested that you boil your water before drinking it.
If you find yourself in a situation where you need to drink water and you need to make a filter then remember this video. IT WILL SAVE YOUR LIFE!
Pingback: How to Use Iodine Tablets to Purify Water | Survival Life
Pingback: How To Make Your Own DIY Water Filtration System | Survival Life
Bill
May 4, 2018 at 9:00 PM
I love water filter/purification articles. I’d still suggest boiling the water or a solar UV purification process (6 hours in direct sunlight) as the final step.
Pingback: DIY 5 Gallon Water Filter - Survive!
Pingback: DIY 5 Gallon Water Filter - Survival Patch
Pingback: DIY 5 Gallon Water Filter
Pingback: 377 Survival Hacks And Skills You Should Know - Survive!
Pingback: 377 Survival Hacks And Skills | survivalisthandbook.com
Pingback: Survival Skills Everyone Should Know And Be Able To Do - Survive!
Pingback: Survival Skills Everyone Should Know And Be Able To Do | survivalisthandbook.com
Pingback: How To Build A DIY Salt Water Distiller | Survival Life
Pingback: Conquering the Cornerstones: Water - the 2nd Pillar of Survival
Pingback: Conquering The Cornerstones: Water – The 2nd Pillar Of Survival – Ultimate Survival Alerts
Pingback: DIY 5-Gallon Water Filter | Primitive technology
Pingback: How To Purify Water | 5 Water Decontamination Techniques
Pingback: Daftar Capsa Online
Pingback: DIY 5-Gallon Water Filter - Outdoor Survival Questions Information Answers
Pingback: How To Purify Water | 5 Water Decontamination Techniques – Ultimate Survival Alerts
Pingback: What Are Your Water Filter Choices? | Survival Go Bag
Pingback: 377 Survival Hacks You Should Learn in 2022 | Your Ultimate Survival Life Hacks Guide – Sprent Brass
Pingback: 377 Great Survival Hacks You Should Learn in 2022 | Free Patriot Gear
Pingback: 377 Great Survival Hacks You Should Learn in 2022 - Survival Shot
Pingback: 377 Great Survival Hacks You Should Learn in 2022 - Les Recettes Savoureuses
Pingback: 377 Great Survival Hacks You Should Learn in 2022 – SurvivalCove.com
Pingback: 377 Great Survival Hacks You Should Learn in 2022 | Spent Brass