Featured Articles
A Primer On Propane For The Practical Prepper-Part II
Learn how to take advantage of propane for cooking and other things in a secure way when the grid goes down.
RELATED: DIY Propane Torch
In this article:
- Propane for Survival
- Refilling One-Pound Canisters from 20-Pound Bulk Tanks
- Propane: It’s Both a Gas and a Liquid, in the Same Tank
- The One-Pound Canister Refilling Process
- The Fuel Transfer Process
- Achieving a Full Refill
- Handle with Care
- Watch Out for Leaks!
Integrating Propane into Your Prepping Strategy
Propane for Survival
Two weeks ago, when I posted an article on prepper propane, I had no idea there was such a thirst for knowledge on the topic. Nor did I expect my technical consultant, Chris Newman, to respond to each and every comment asked not only here but also on Before Its News.
Today I am sharing Part Two in the series “A Primer on Propane for Prepping and Survival.” If you haven’t read it yet, part one covered propane safety and various types of tanks.
It also talks about the cost-benefit of refilling empty tanks and how to obtain free (or cheap) old-style bulk tanks. What you learned in part one was how, with some creative scrounging and smart purchasing, to acquire enough tanks to provide at least minimal cooking and night lighting for about a year, at a nominal cost.
If you haven’t yet read Part One, you’ll find it here: A Primer on Propane for Prepping and Survival.
In this article, we will cover the easy low-cost refilling of expensive (when new) green one-pound canisters. We’ll also cover some of the main low-usage appliances for propane that will make life easier and more secure.
This is useful in a grid-down scenario while transitioning to possible new world order.
Refilling One-Pound Canisters from 20-Pound Bulk Tanks
With the right kind of adapter, it’s a fairly simple process to transfer liquid propane into small green canisters. There are a couple of critical things to keep in mind, however:
Propane in the container is in two forms: liquid and gas. These are both pure propane properties.
At room temperatures, however, the liquid will quickly expand in volume to a gas as the vapor pressure reduces. There are no practical liquid propane uses other than transferring it between containers.
There can be lots of potential problems, so you want to avoid releasing liquid propane, whatever it takes.
If you deliver liquid form into a small propane heater, for instance, the liquid fuel can do some real damage. It will render the heater inoperable, with no easy repair.
A more critical example would be if you connected a one-pound canister to a camp stove. This happens with the canister either over-filled or upside down, so that the output is liquid, instead of gas.
Liquid propane could jet out of the burners. It’ll quickly expand to a large cloud of gas just when you’re trying to light it.
It may result in something going to go Boom! With any luck, the only thing that will get singed is your eyebrows.
Although, you could also destroy the equipment and even suffer painful eye injuries and take a long time to heal.
There’s a danger with a huge cloud of flame and you happened to be sharply inhaling.
You’ll end up literally breathing in the flame into your lungs. They will start oozing liquid to the point of filling up.
You will probably die of pneumonia within 15 minutes if you’re lucky. If you’re not lucky, it will take even longer.
I can promise you that it will be the most miserable 15 minutes of your life. In a slightly different scenario, this actually happened five years ago to someone for whom I cared a great deal, and Julie did die, alone on the floor of her kitchen, with her traumatized dog lying by her side.
The memory still makes me ill. So, I’m here to tell you that this type of deadly injury really can happen.
Sorry to get so heavy, but this really happened in my life and my point in making this so personal is to hammer home the point that, when you play with propane, you’re literally playing with fire and a more of it than you’ve probably ever experienced.
Like a firearm, propane is a powerful and valuable survival tool, but it needs to be handled with the utmost of both understanding and respect. That’s why I keep hitting safety issues so hard and so frequently.
So, before you start down this propane road, especially if you’re going to color outside of the lines, you’d better have a very clear idea of what you’re doing. That’s the whole purpose of this long article, which is intended to bring the average reader up to speed from a standing start.
But, if you keep a few possibly-new basic principals in mind and carefully read all of the instructions that come with every propane appliance, propane can also save your life, or at least make it a lot more pleasant in a grid-down situation.
Propane: It’s Both a Gas and a Liquid, in the Same Tank
Again, propane inside the tank is in both a gas and a liquid form that can quickly expand into a surprisingly large cloud of gas and that can touch off into a large explosion with the slightest spark.
Fortunately, it is easy to choose which form, gas or liquid, that you want to dispense out of the container, depending upon whether you are transferring fuel between containers or using it for practical purposes:
When the container is standing upright with the outlet at the top, the liquid propane is at the bottom of the tank, so what will come out is the gaseous form, which will be quickly replenished from the liquid form as internal tank pressure goes down. When you’re using propane for practical purposes, this gas is what you want.
But, when the tanks are upside down or possible on their sides, what will come out is liquid propane. Generally, the only time that you want this liquid is when you’re transferring fuel from one container to another.
Just keep in mind, for consumer-level propane hardware: “Upright gets you gas and upside-down gets you liquid.”
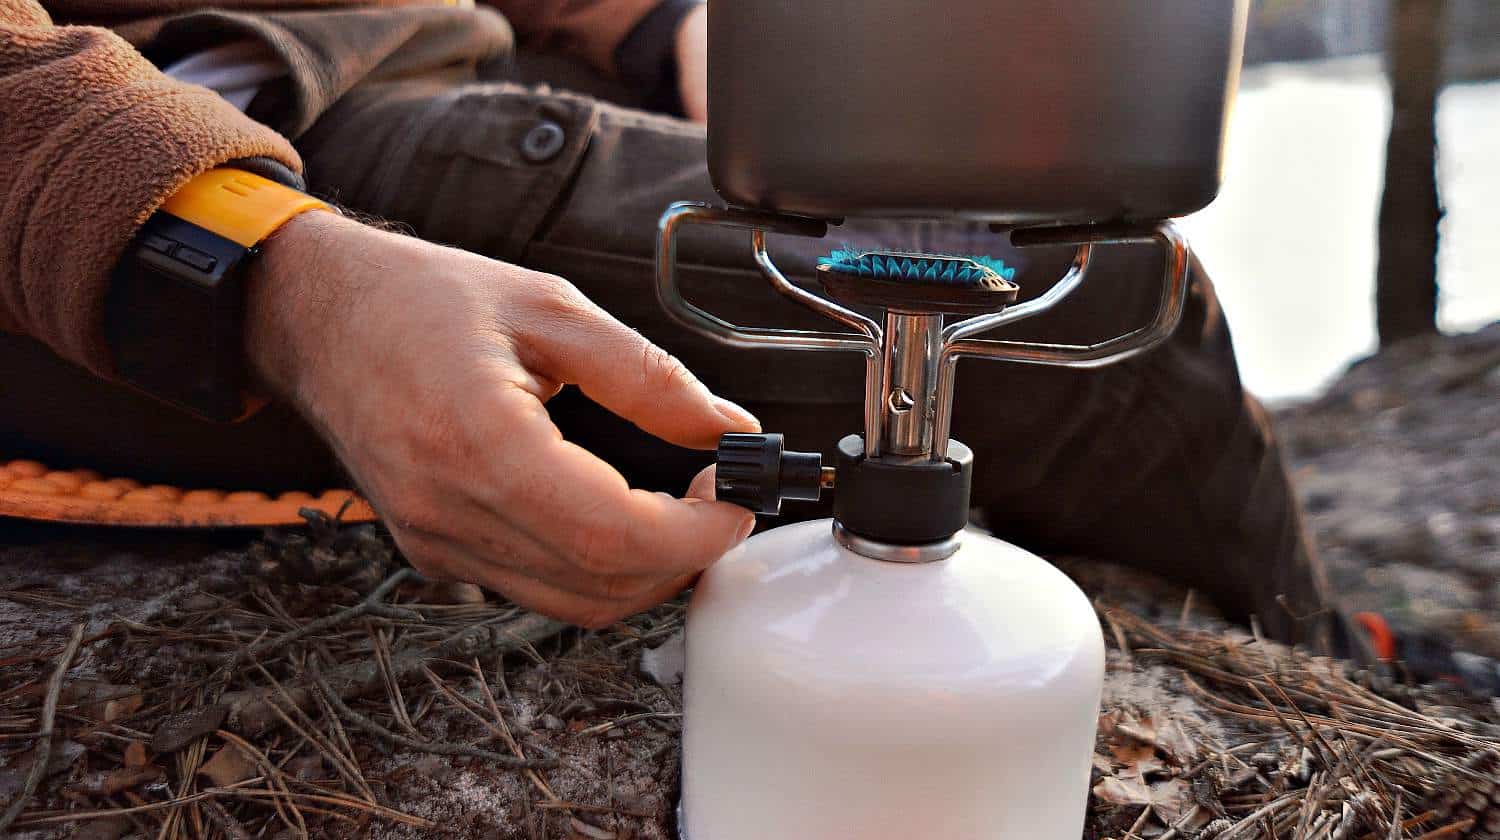
The One-Pound Canister Refilling Process
|
The key component that you need to refill small one-pound propane canisters is an adapter that costs about $15 and is called a MacCoupler Adapter.
In the photo above, on the right side, you can see the black rubber O-ring that seals it to the bulk tank.
Here are photos showing it mounted onto a bulk tank.
|
Don’t forget, this is a reverse thread, so turn it *counter-clockwise” (lefty-tighty).
You can start threading this in by hand. Tighten lightly, but still with a wrench.
The photos below show proper container orientation during various operations.
Above: The proper position to transfer fuel from the bulk tank into the canister. (The plastic tank wrapper has since been removed.)
|
Above: The proper orientation to transfer fuel from a canister back into the bulk tank. If you want to completely refill the bulk tank, you’ll have to go through this operation at least 20 times.
But, if you’re throwing a big barbecue and run out of gas, this could save the day. Ditto, if you need to run something that’s set up for bulk tanks, but all of yours are empty.
RELATED: Off The Grid Cooking Gear and Tips
The Fuel Transfer Process
Transferring fuel from one tank to another is relatively simple:
1. *With the tank valve closed,* install the reverse-thread adapter onto the bulk tank. Tighten it with a wrench until it is moderately snug.
Don’t forget that it’s a reverse thread direction than normal. The actual sealing mechanism is a rubber O-ring on the adapter and these don’t require huge torque pressures to seal.
“Just snug” is just right. You’ll find specific directions on tightening a little further below.
2. If refilling a small canister, turn the bulk tank upside down and place it on a flat sturdy surface. Remember, you want to transfer the liquid form from the bottom, so the outlet needs to be at the bottom. Keep the bulk tank valve closed.
3. Attach the canister to be refilled into the other side of the adapter. This time, however, the threads run in the normal “righty-tighty” direction. Again, the seal mechanism is a rubber ring, so just snug it in place.
Important Note: If the adapter connected to the tank is too loose and you screw in the canister on the other side with too much force, you will actually start unscrewing the adapter from the tank, potentially releasing gas into the airspace that you’re currently occupying. Again, “no bueno.” This is why you need to keep the bulk tank valve closed at all times, except when you are making the fuel transfer.
4. Once everything is properly connected, it’s time to open the tank valve and let the transferring commence. Keep an eye and ear peeled for gas leaks, in the form of a cloud of white gas. It may take a minute or so to complete the transfer.
The temperature and remaining contents in the supply tank impacts the supply pressure. When the hissing stops, you’ve transferred as much as is going to move right now. This is going to give you about a 50% fill of the canister.
(Transferring fuel from a canister to a bulk tank is the same process, but the canister needs to be upside down and the bulk tank on its side, as in the above photo.)
Achieving a Full Refill
But, wait! We haven’t run out of surprises, yet!
The most common challenge in refilling one-pound canisters is that it is normally very difficult to completely refill the canister.
This latest surprise stems from the fact that, while the liquid fuel temperature drops as the supply diminish, at the same time, as fuel enters into a new container, the internal pressure increases, the canister gets *hotter* as a result and the pressure resisting the transfer into the canister rises nearly exponentially.
At the same time, during the transfer process, the supply tank pressure drops and the dispensing pressure decreases.
The bottom line result is that a one-pound receiving canister typically will only become about half-filled during the transfer, not to mention becoming quite warm.
So, it will only last half as long before it runs dry. Assumed is that we want a full fill-up, or nearly so.
The most accurate way to keep track of the fill level is to weigh the canister with a small scale when it’s empty (you can’t hear any liquid sloshing around inside) and then weigh it again after filling. With a full fill, it should weigh exactly 16 ounces more than when empty.
Safety Note: You do NOT want to over-fill a receiving canister, and this is possible by having the supply tank too hot. That risks dispensing liquid fuel into your appliance, even if the canister is properly oriented, which can cause flash clouds of flame and/or damage the appliance itself, as described above.
Conceivably, you could even risk bursting the canister by overfilling, explosively releasing a pound of vapor.
The package insert that comes with the adapter contains a couple of dozen warnings and you should read and memorize all of them, as well as the safety warnings that come with every appliance. This isn’t salad oil, here.
The factory that fills new canisters uses high pressure pumps to overcome this temperature resistance phenomenon. But, we don’t have that option, which is probably just as well.
What you want for the best fill is a warm (not hot) supply tank and a cold receiving tank. The Net is full of suggestions on how to achieve this, some good and some very bad.
One of the worst ideas I’ve seen is heating up the bulk tank. Not only that, it’s left sitting under the sun for hours.
As we learned in the scout camping cautionary tale above, again, no bueno. Do NOT fill or top off a one-pound canister from a hot (more than 85 degrees F.) bulk tank.
If the ambient air temperature is higher than 85, it’s just not a good time to refill canisters. If this is an issue in your situation, the first thing in the morning is the best time.
Other suggestions, including in the MacCoupler adapter insert, suggest pre-cooling the receiving canister by either sticking it in the freezer or dunking it in ice water prior to filling.
These are fairly effective at pre-compensating for “thermal resistance.” Though in a grid-down scenario, freezers and ice water may be very hard to come by.
Here’s the easy way to get a full fill: Fill the canister twice.
Fill the canister as full as it will get without special temperature tricks. Turn off the bulk tank valve and then let the canister cool back down in the shade.
Then, once it has cooled back down, top it off with a second transfer. Generally, this will get you about a 90% fill.
It’s usually good enough and leaves a little extra safety cushion to avoid an over-fill. It never hurts to leave in a little safety cushion.
If you have a scale, you can get a strong handle on your fill rates by weighing the canister before and after both steps. With a little practice, you’ll be able to make a pretty good guess without a scale.
Examine the heft of the canister and the amount of “slosh” that you hear inside.
Handle with Care
While we’re on the subject of using propane adapters etc., in a grid down situation, these will be simply irreplaceable.
They are the critical link in the canister refill system. There’s no way to easily cobble one together out of salvage.
For this reason alone, it would be wise to have a new spare adapter in stock. If you don’t anticipate being able to easily replace this adapter, or even if you can, you need to treat these things with some gentle care.
These adapters are made out of relatively soft brass. So, it’s very easy to damage or even wear out the threads from hard repeated use, which could render the adapter useless, and make it no longer possible to refill small canisters from bulk tanks.
If that happens, you’ll be stuck with all these handy portable propane appliances, but with no easy way to fuel them.
Here are several things that will extend the life of the adapter threads:
1. The first, obviously, is to not drop the adapter onto a hard surface: Hitting a rock can totally mess up the threads.
You might be able to clean up the threads with a file or by gently starting it into the bulk tank threads and carefully using a wrench to restore the position of the banged-up threads, though they won’t be as strong resisting pressures of up to 200 PSI.
For sure, make certain that whenever you start threading in the adapter, you start it in straight, not “cross-threaded.” If you can easily screw it in for a couple of turns with just finger pressure, you’re in good shape.
2. Another life-extending strategy is to lubricate the threads of the adapter before screwing it in or screwing something into it.
A thin coating of axle grease or Vaseline would work fine. But, be sure to not let any get into the end opening or it will end up inside your smaller canister and eventually into the appliance, which could clog it up and prevent it from working properly.
In a pinch, pull the oil dipstick out of your vehicle’s engine and let a drop or two drip off the bottom of the stick onto the threads. Even a light rubbing with a bar of soap will help to extend the thread life. Just don’t use any more lubrication than it takes to reduce the friction wear on the threads.
3. Another tip to minimize thread wear is to start threading the adapter onto the tank by hand, as tight as you can get it, until it starts resisting. Only then, tighten it down with a 1 1/8″ wrench.
Over-tightening is what will wear out the threads the fastest and with a wrench this large, that’s easy to do. The main sealing mechanism isn’t friction or compression, as with other fittings, but a small rubber O-ring on the adapter that mates with another O-ring inside the bulk tank throat.
The new OPD type tanks have a second spring-loaded internal valve that prevents gas from escaping when the valve is opened, but nothing is hooked to it. “Hand tight to first contact, plus about 2 to 2 1/2 turns more with a wrench” should be about right.
And, of course, when you’re removing the adapter, remember the reverse thread and rotate the adapter on the clockwise direction: Righty-Loosy. There’s no faster way to strip out the threads then cranking it in the wrong direction with a big wrench during removal.
Watch Out for Leaks!
Finally, something to be very aware when you refill one-pound propane canisters, which are really intended to be a one-shot deal that you throw away when it empties, is that the internal valve on the canister just might develop a slow leak. This is not uncommon with multiple refills, or even just one.
At best, you won’t have the fuel when you need it. At worst, that pound of gas can leak into a closed environment, such as a hot car trunk or closet and make a very satisfying explosion, unless you happen to be in the middle of it.
For canister propane refill, always test it by dropping in a little soapy water into the top of the bottle. If you see bubbles forming, you’ve got a leaker that will slowly (or quickly) empty out.
This is also a good way to test all new propane connections. Rinse soapy water out of the canister outlet with a little clean water and let it dry before using it.
You can usually smell a small leak, too. The refiners add a “smellorant” that is very distinctive.
If you can smell it, you need to act fast.
If the canister leaks badly enough to hear the hissing and you see a cloud of white vapor, you need to carefully move the canister to a safe and well-ventilated outdoor location, move away, let it empty out and then throw it away. You might find some use for it or else recycle the sheet metal to repair something else.
Remember, we’re talking about a grid-down situation that may be long term. It’s wise not to throw away anything that can be recycled or repurposed.
Even tin cans and leaky fuel canisters.
If you get a moderate leaker, there are some things that you can do about it:
1. Mark the canister, if only marking an “L” in the paint on top of the shoulder, so that you can easily identify it later. They all look alike.
2. Attach something to the canister threads that will prevent further leaking. This is not a bad idea, anyway, when storing and transporting canisters. This “something” will be either screw-on caps or some sort of appliance that has a shut-off valve.
The least expensive option that I’ve been able to find is the Mac Coupler Propane Bottle Cap aka MacCaps. Two of these heavy-duty brass caps will run you about $8, plus shipping.
They’re also fairly common in sporting goods stores and departments for about the same price, but without the shipping cost.
These will certainly stop leaks, as well as protecting the canister threads, which are actually fairly durable. But, if you have dozens of irreplaceable canisters in your inventory, this can get spendy.
Another option is to attach the leaky canister to a propane appliance. Use the control valve on that to stop the leak.
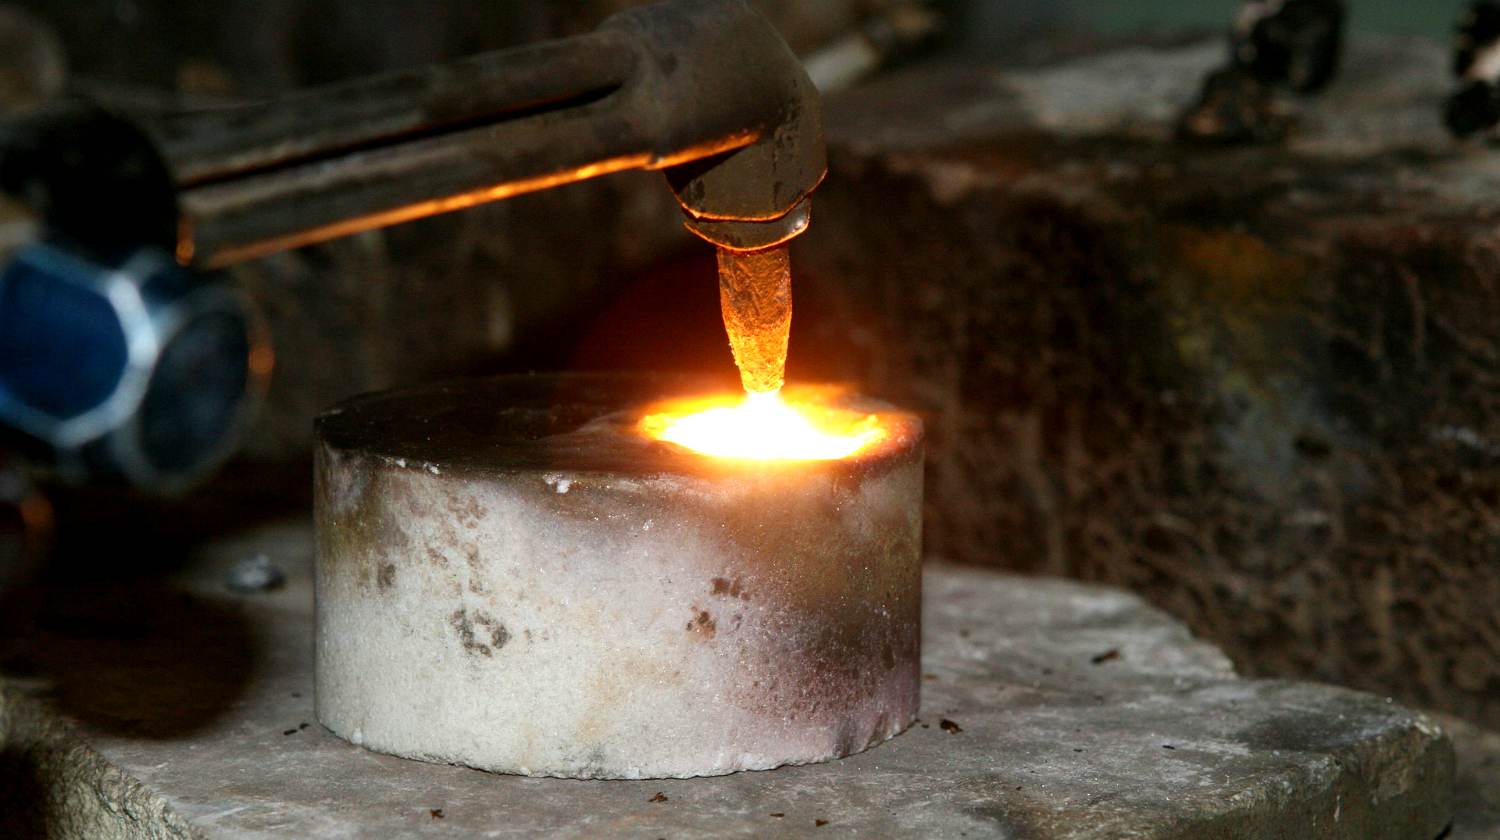
One of my preferences is a small and inexpensive propane torch. There are some plumbers use to solder copper pipes and which can thaw frozen locks, etc.
These torches will also do a great job of starting campfires even in windy situations, at least with fairly dry wood.
For new torches, one good value option is the Mag-Torch MT200C Propane Pencil Flame Burner Torch. One thing that I like about this one is the all-brass construction, which should be durable under most conditions.
Other brands use a lot of plastic and their durability might be questionable. With one of these and a welder’s flint striker (described below), you can just about kindle a flame in a hurricane and it’s very unlikely to blow out.
In a pinch, you could even boil some drinking water in a small tin can without having to build a campfire.
A self-igniting small torch could also prove very handy as a sure-fire flame source in almost all conditions, sort of like a Bic lighter on steroids. But, these are going to tend to be not as durable, so they should be held in reserve when any torch use is needed.
You can also frequently find these torches, and other propane camping gear, cheap at yard sales, too, and it doesn’t hurt to have backups, especially if you need something to “cap” a small canister that has started leaking, in order to keep it in service.
I’ve picked up used serviceable torches for less than the cost of a new cap. Of course, test out any used propane gear as soon as you can, preferably before you lay out any cash.
But, it usually tends to be fairly durable. If you’re going yard-saling, it couldn’t hurt to bring along your own fuel canister for testing, properly stoppered, of course.
3. The third option with slow-leak canisters is the “just in time” method: Just don’t refill them until you need them, then quickly attach them to the appliance. Keep a couple of refilled standby canisters on hand with some sort of capping device and leave the bulk supply tank set up to quickly refill them on demand.
The rest of your stockpile of empty canisters is your reserve to replace the inevitable bad leakers.
When working with slow leak canisters, if you must, do this outdoors away from ignition sources, for sure, and don’t dally about connecting it up or capping it. Again, if it’s a fast-leaking canister unless there is no other choice, take it out of the inventory and find another use for it.
That’s it for refilling small green canisters from bulk tanks. With a little common sense and some patience waiting for the canister to cool back down for a top-off filling, you’re good to go.
Watch this video by Iridium242 on how to run your ISO butane camp stove on propane:
Lighting and cooking materials are very important in a survival situation. You can learn all the outdoor skills needed to get you through.
But what if it’s unsafe to leave your home? Make use of the propane information above and it might just save your life when SHTF!
Got some tips on how to use propane in your prepping? Share your thoughts with us in the comments section below!
UP NEXT:
- Sustainable Electric Power
- 8 Ways To Generate Electricity At Home
- 9 Famine Survival Tips: How To Survive Food Shortage
Editor’s Note: This post was originally published on May 16, 2013, and has been updated for quality and relevancy.
-

 Do It Yourself7 months ago
Paracord Projects | 36 Cool Paracord Ideas For Your Paracord Survival Projects
-
 Do It Yourself9 months ago
How To Make Paracord Survival Bracelets | DIY Survival Prepping
-
 Do It Yourself9 months ago
21 Home Remedies For Toothache Pain Relief
-
 Do It Yourself10 months ago
Survival DIY: How To Melt Aluminum Cans For Casting
-
 Exports8 months ago
Are Switchblades Legal? Knife Laws By State
ALBERT
May 16, 2013 at 2:19 PM
Great Topic, Next you should have a story about the many uses of MAPP Gas, Or LOX, .
Don’t forget, SAFETY FIRST.
John
May 18, 2013 at 6:56 PM
Be very careful when turning propane tanks upside down……the liquid sitting against the safety valve could cause it to rupture and create a whole new problem
MARKWW
November 17, 2013 at 7:56 AM
In one of the pics your tank valve is rusted and unsafe to use. Always be sure to look at tanks before getting them from racks. Also have you looked at the prices now tanks cost almost doubled in the last year
MARKWW